❌

Vue normale

Button minimum width

9 septembre 2022 à 02:00

A common mistake is to assume that a button width should be as equal to its content plus the horizontal padding. This might work as expected for a one-language website (e.g: English) but it can easily fail with multilingual websites.

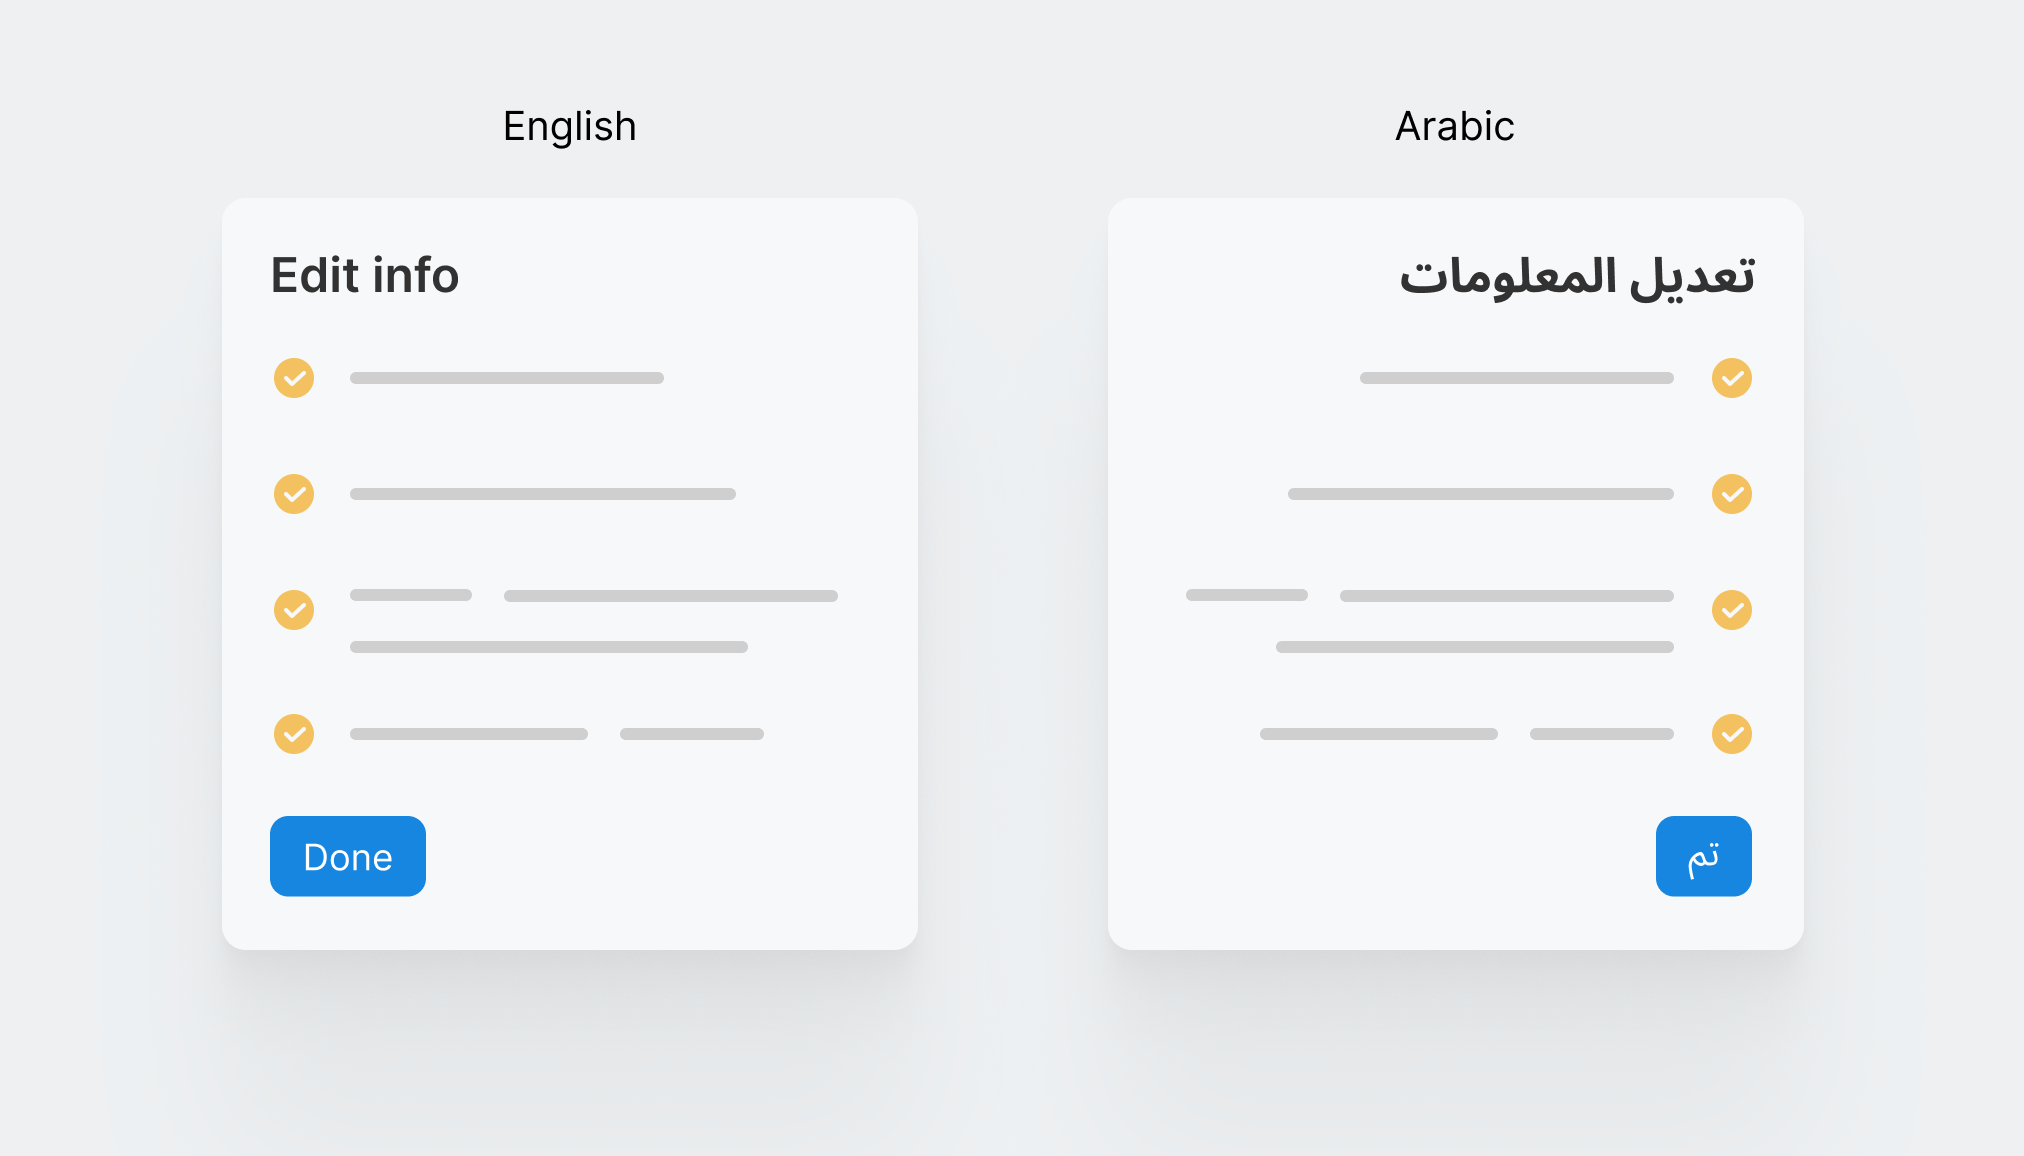
Consider the following example.

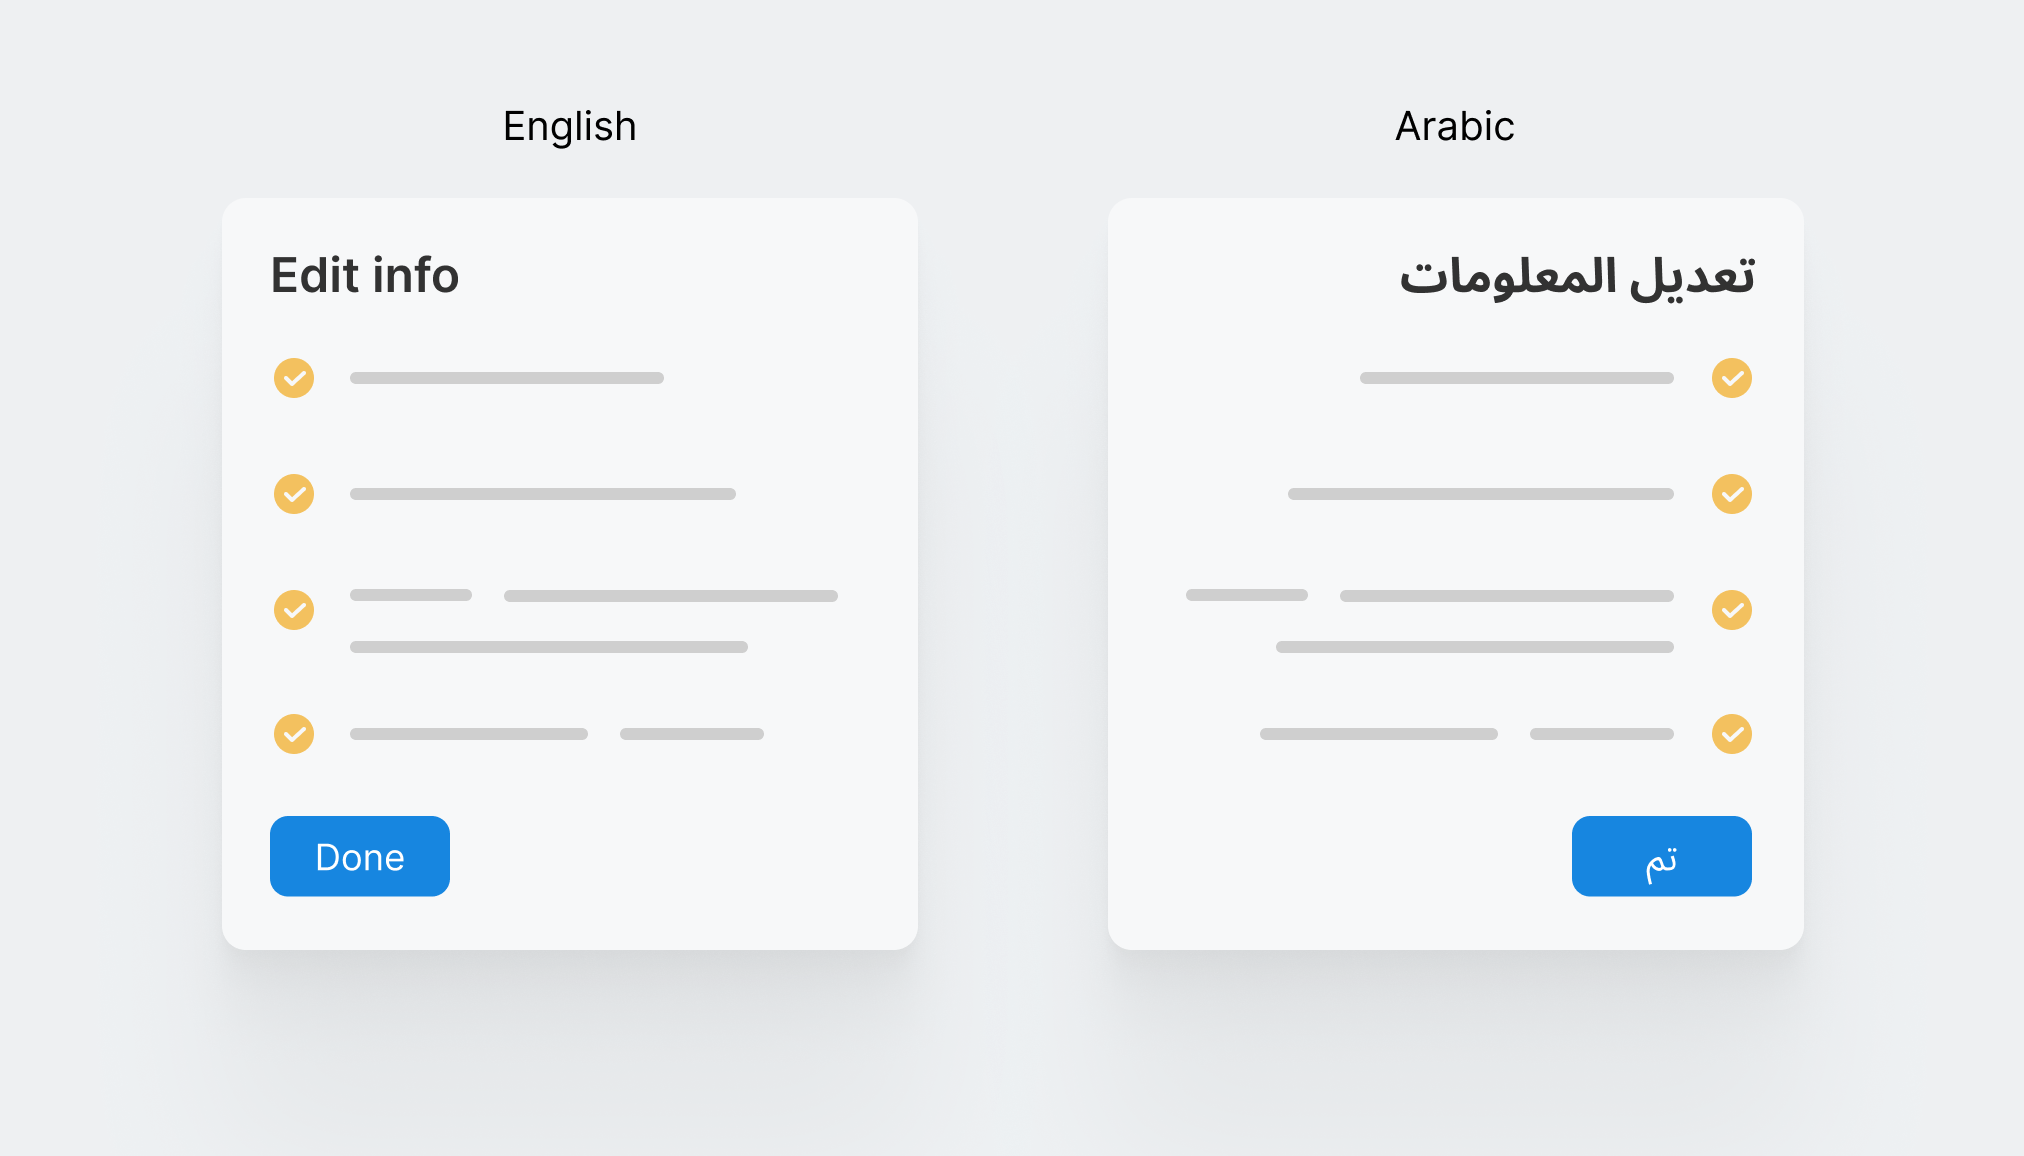
On the left, the button width works well since the word "Done" is long enough. However, in Arabic, it's translated to "تم" and thus the button width became too small. From a UX perspective, this isn't good as a call to action button must be large enough, specially for touch.

To avoid that, we can set a minimum width for the button in advance.

.button {
min-width: 90px;
}

That way, the button will have a fixed minimum width that can grow if the button's label is longer.

Play with the demo below to see the issue and the fix in action.

To learn more about writing CSS for RTL (Right-to-left), I wrote a complete guide on that.

Input zoom on iOS Safari

27 mai 2022 à 02:00

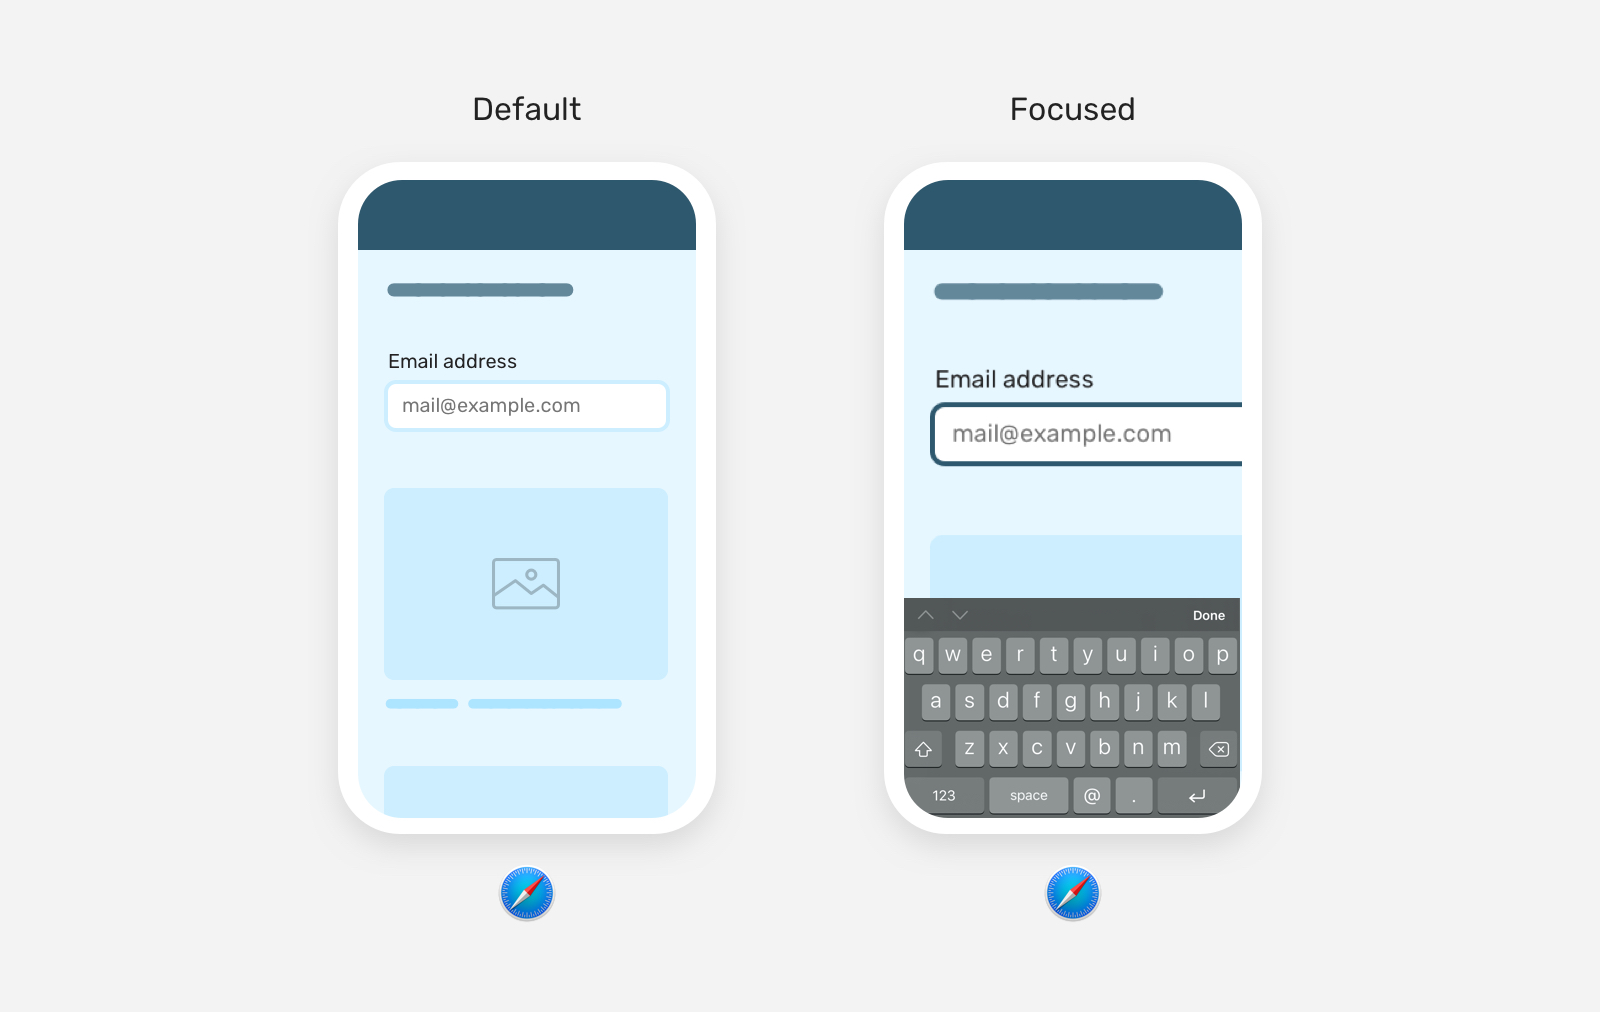
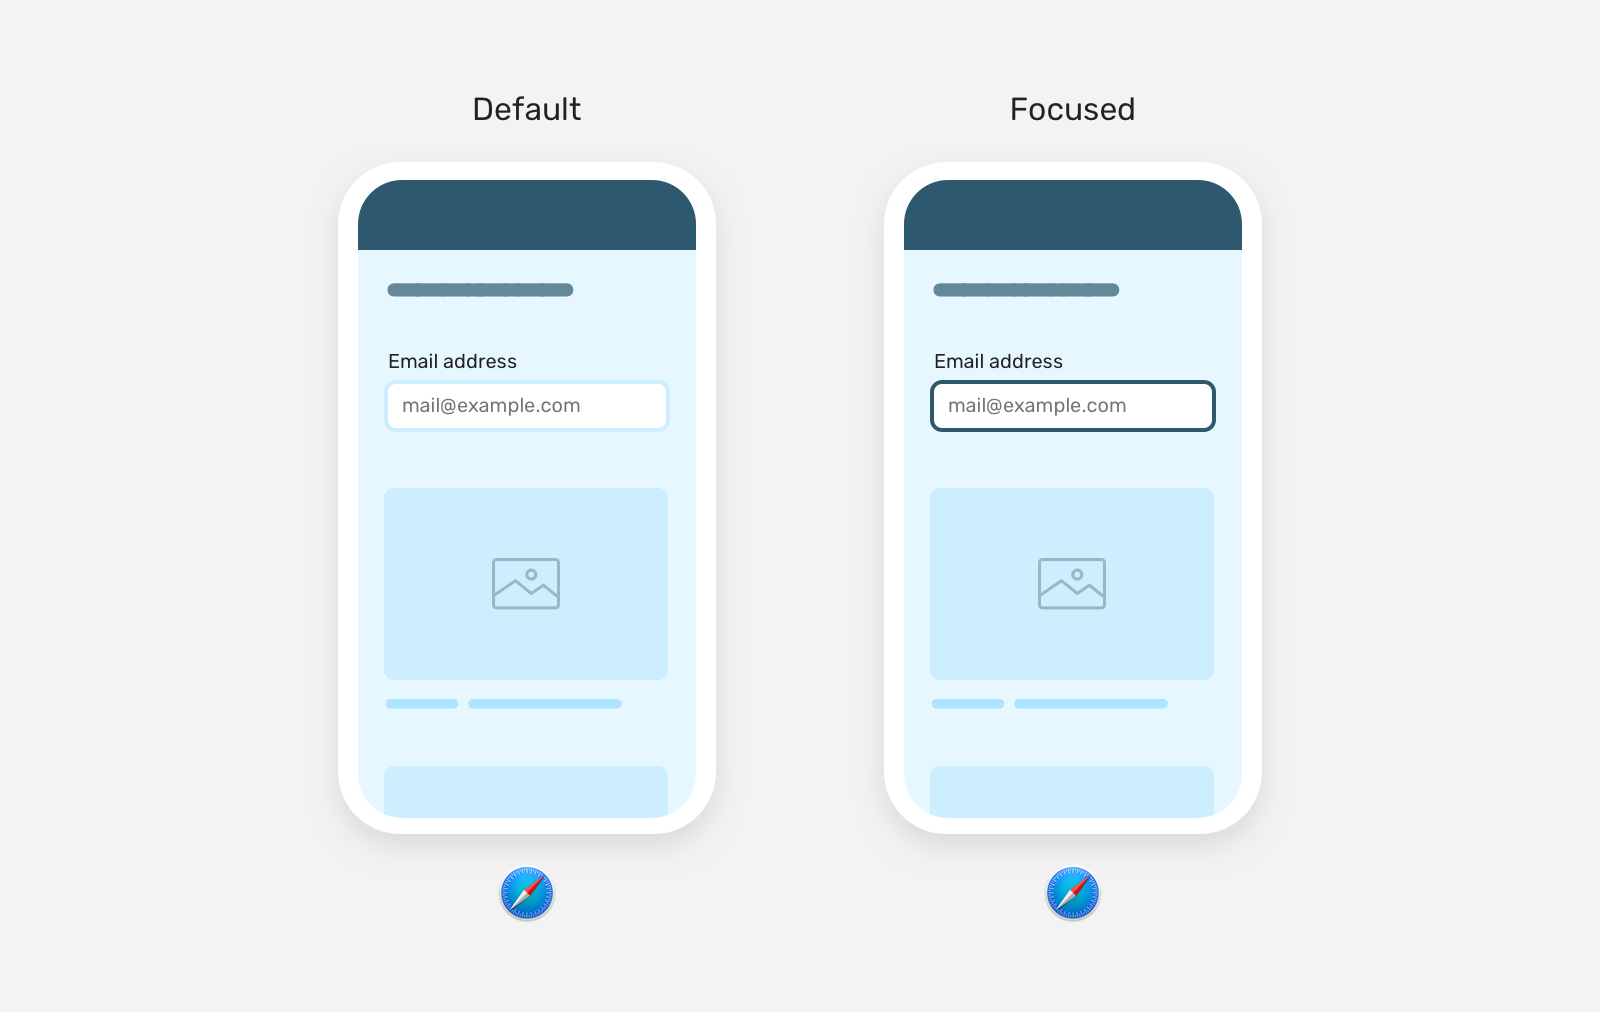
When focusing an input in iOS Safari, the whole web page will zoom by default. This is a common behavior in Safari. It's annoying, since when zooming the page, it won't zoom out as the input is no longer focused.

The solution is fairly simple, which is to add font-size: 16px to the input.

input {
font-size: 16px;
}

By the way, zooming in is a good thing. Some users might prefer to see what they're typing in a large text, but what annoys me personally is that Safari only zoom-in, and left the user figure out themselves to zoom-out. That's why I would prefer to reset that early on.

Default flexbox stretching

27 mai 2022 à 02:00

In flexbox, the default behaviour for flex items is to stretch. If a child item has content longer than its sibling, this will cause the other item to stretch.

This can't be spotted easily unless we add longer content than expected to a flex item.

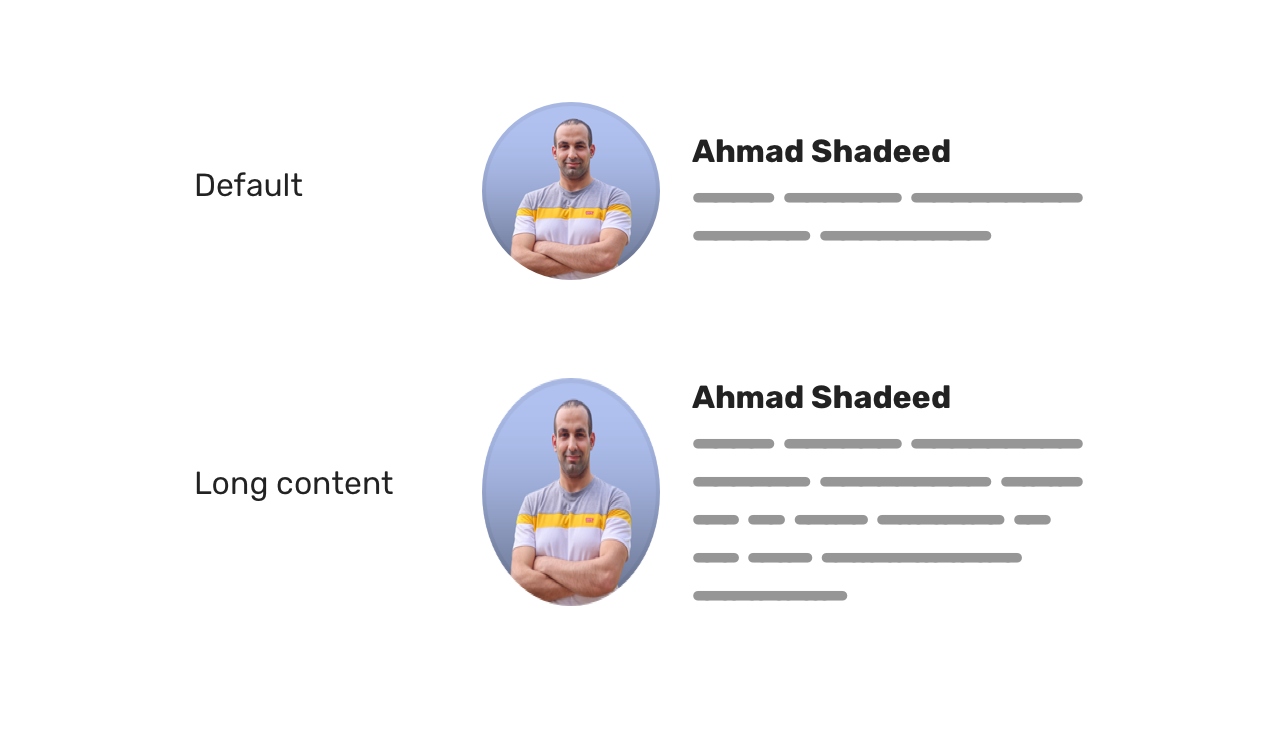
Consider the following HTML and figure. We have a component that contains an avatar, name, and a biography.

<div class="person">
<img class="person__avatar" src="img/avatar.jpg" alt="">
<div class="person__content">
<h3>Ahmad Shadeed</h3>
<p><!-- Description goes here.. --></p>
</div>
</div>
.person {
display: flex;
}

When the bio content (the .person__content element) exceeds the height of the avatar, this will result in the stretching of the avatar.

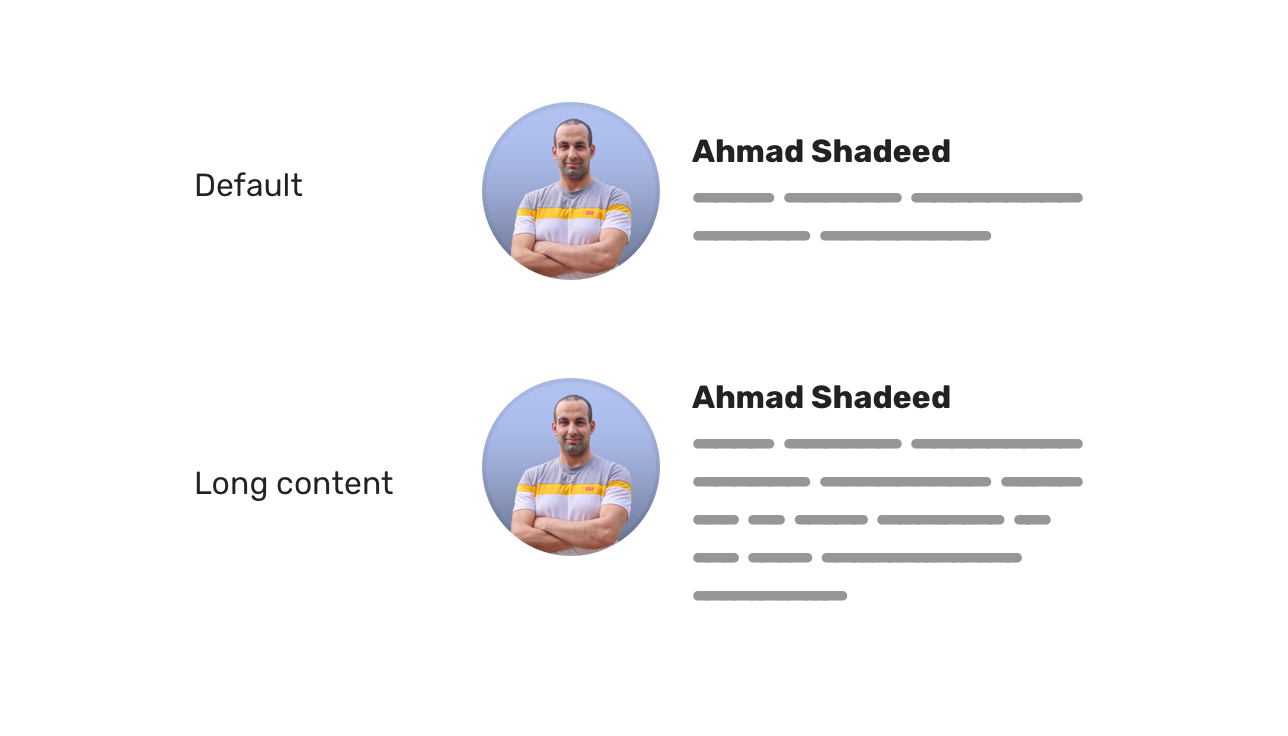
To fix that, we need to override the default stretching behavior and keep the avatar aligned to the start (or the center) of its parent.

.person__avatar {
/* other styles */
align-self: start;
}

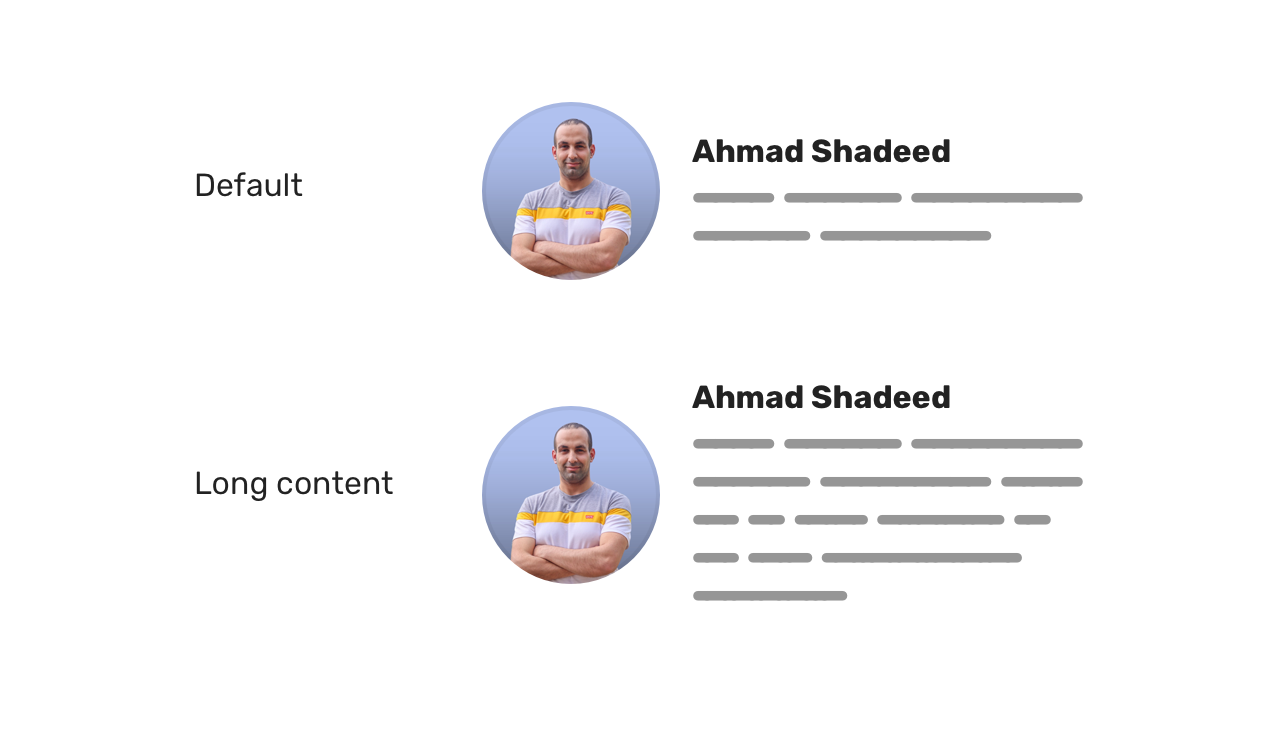
Or you can use align-items: center on the parent element. Whatever works best for your case!

.person {
display: flex;
align-items: center;
}

Examples and use cases

Lorem ipsum, dolor sit amet consectetur adipisicing elit. Doloremque harum est eum aperiam sed ut soluta quia nisi asperiores autem. Corporis consectetur amet sapiente necessitatibus veritatis aut quia maiores. Enim. t soluta quia nisi asperiores autem. Corporis consectetur amet sapiente necessitatibus veritatis aut quia maiores. Enim

Image inner border

30 avril 2022 à 02:00

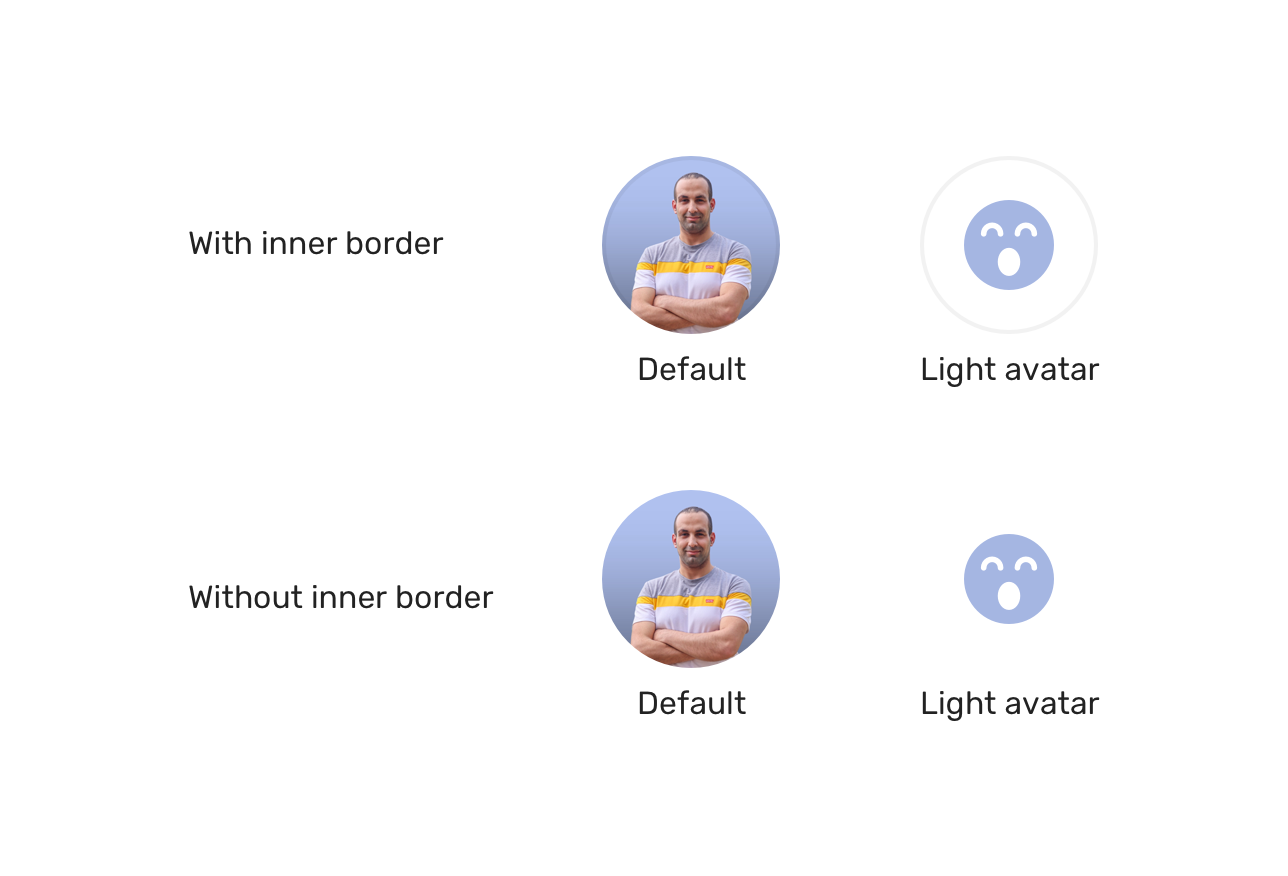
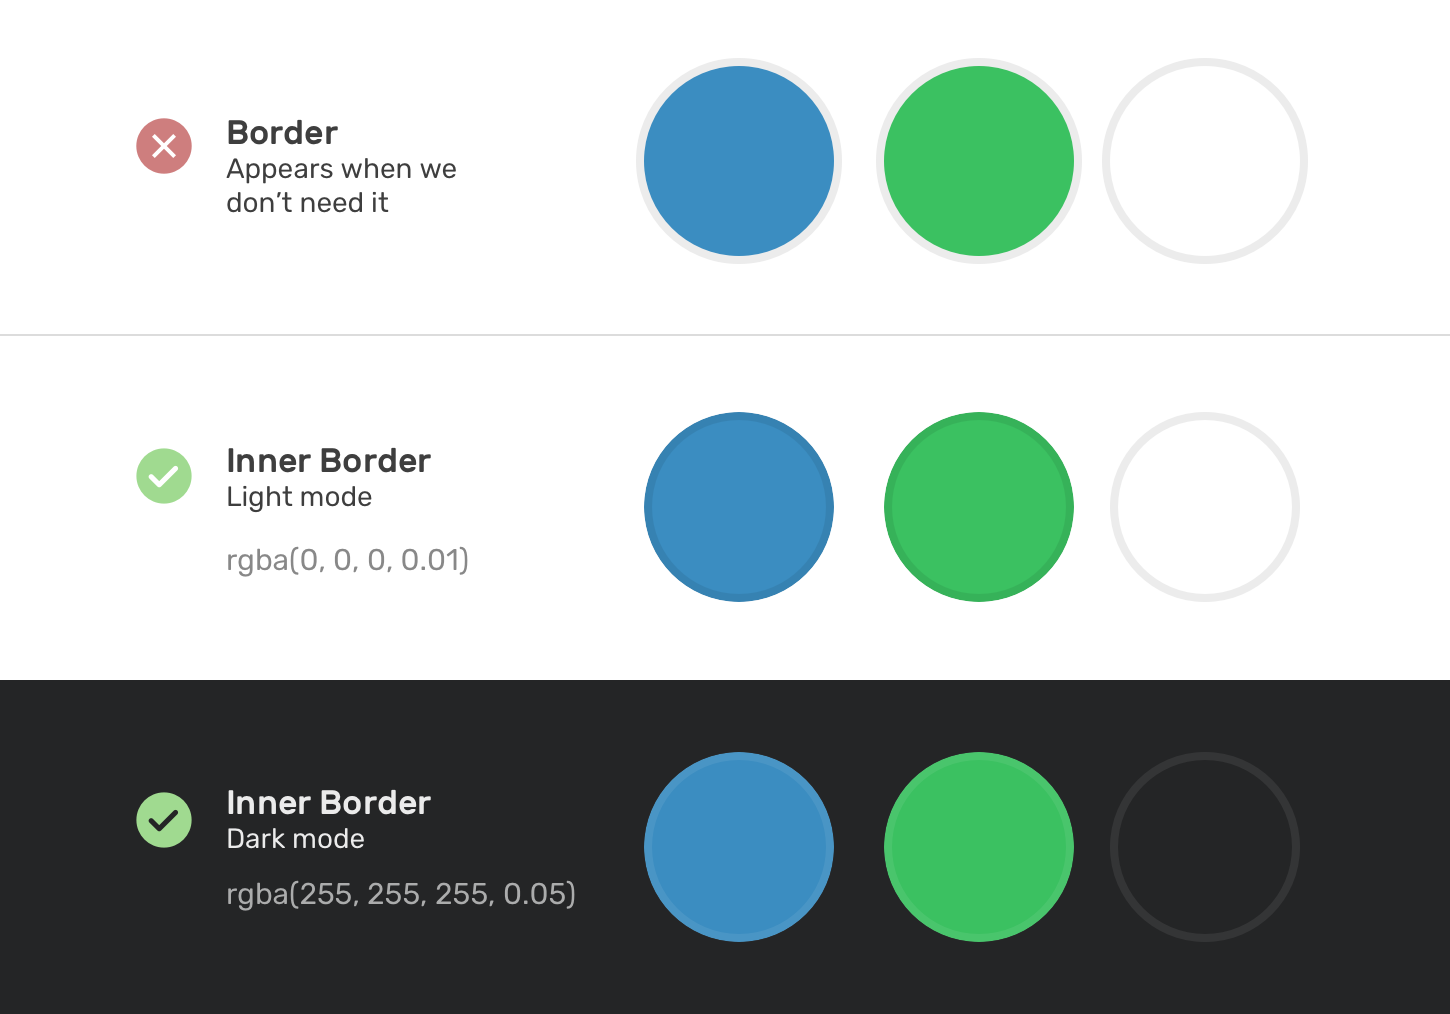
When dealing with user avatars, it can be challenging to display them all in a clear way. That's because some images are too light, thus it might blend with the background underneath it, specially if it's a white one.

Consider the following figure.

Notice how in the first row, the second avatar is blended with the white background. However, when we have a border, it's much better.

We can prevent that in advance and add an inner border to the image. Not only that, but we cal also think about dark mode too!

In CSS, we can mimic the inner border by using an inset box-shadow. The challenge though is that it's not possible to add an inset shadow to an <img> element. As a result, we need to wrap the image in another element and apply the inner shadow to it.

<div class="card__avatar">
<img src="assets/shadeed.jpg" alt="" />
<div class="border"></div>
</div>
.card__avatar {
position: relative;
}

.card__avatar img {
width: 56px;
height: 56px;
border-radius: 50%;
}

.border {
position: absolute;
width: 56px;
height: 56px;
border: 2px solid #000;
border-radius: 50%;
opacity: 0.1;
}

Accidental hover on mobile

30 avril 2022 à 02:00

We use hover effects to provide an indication to the user that an element is clickable or active. That is fine for devices that have a mouse or a trackpad. However, for mobile browsing hover effects can get confusing.

While scrolling in a page, your finger can accidentally do a half-tap which will trigger the hover state of a specific element.

Consider the following figure.

While the user is scrolling, a hover was triggered. At this point, the user didn't mean to do that at all since there is no hover on mobile.

The solution for this is to use the hover media query. It's possible to detect if the user's current input tool (trackpad vs mouse) can hover over elements.

@media (hover: hover) {
.card:hover {
/* Add hover styles.. */
}
}

That way, the hover style will only work when the user is using a tool device like a mouse or a trackpad.

Vertical media queries

20 avril 2022 à 02:00

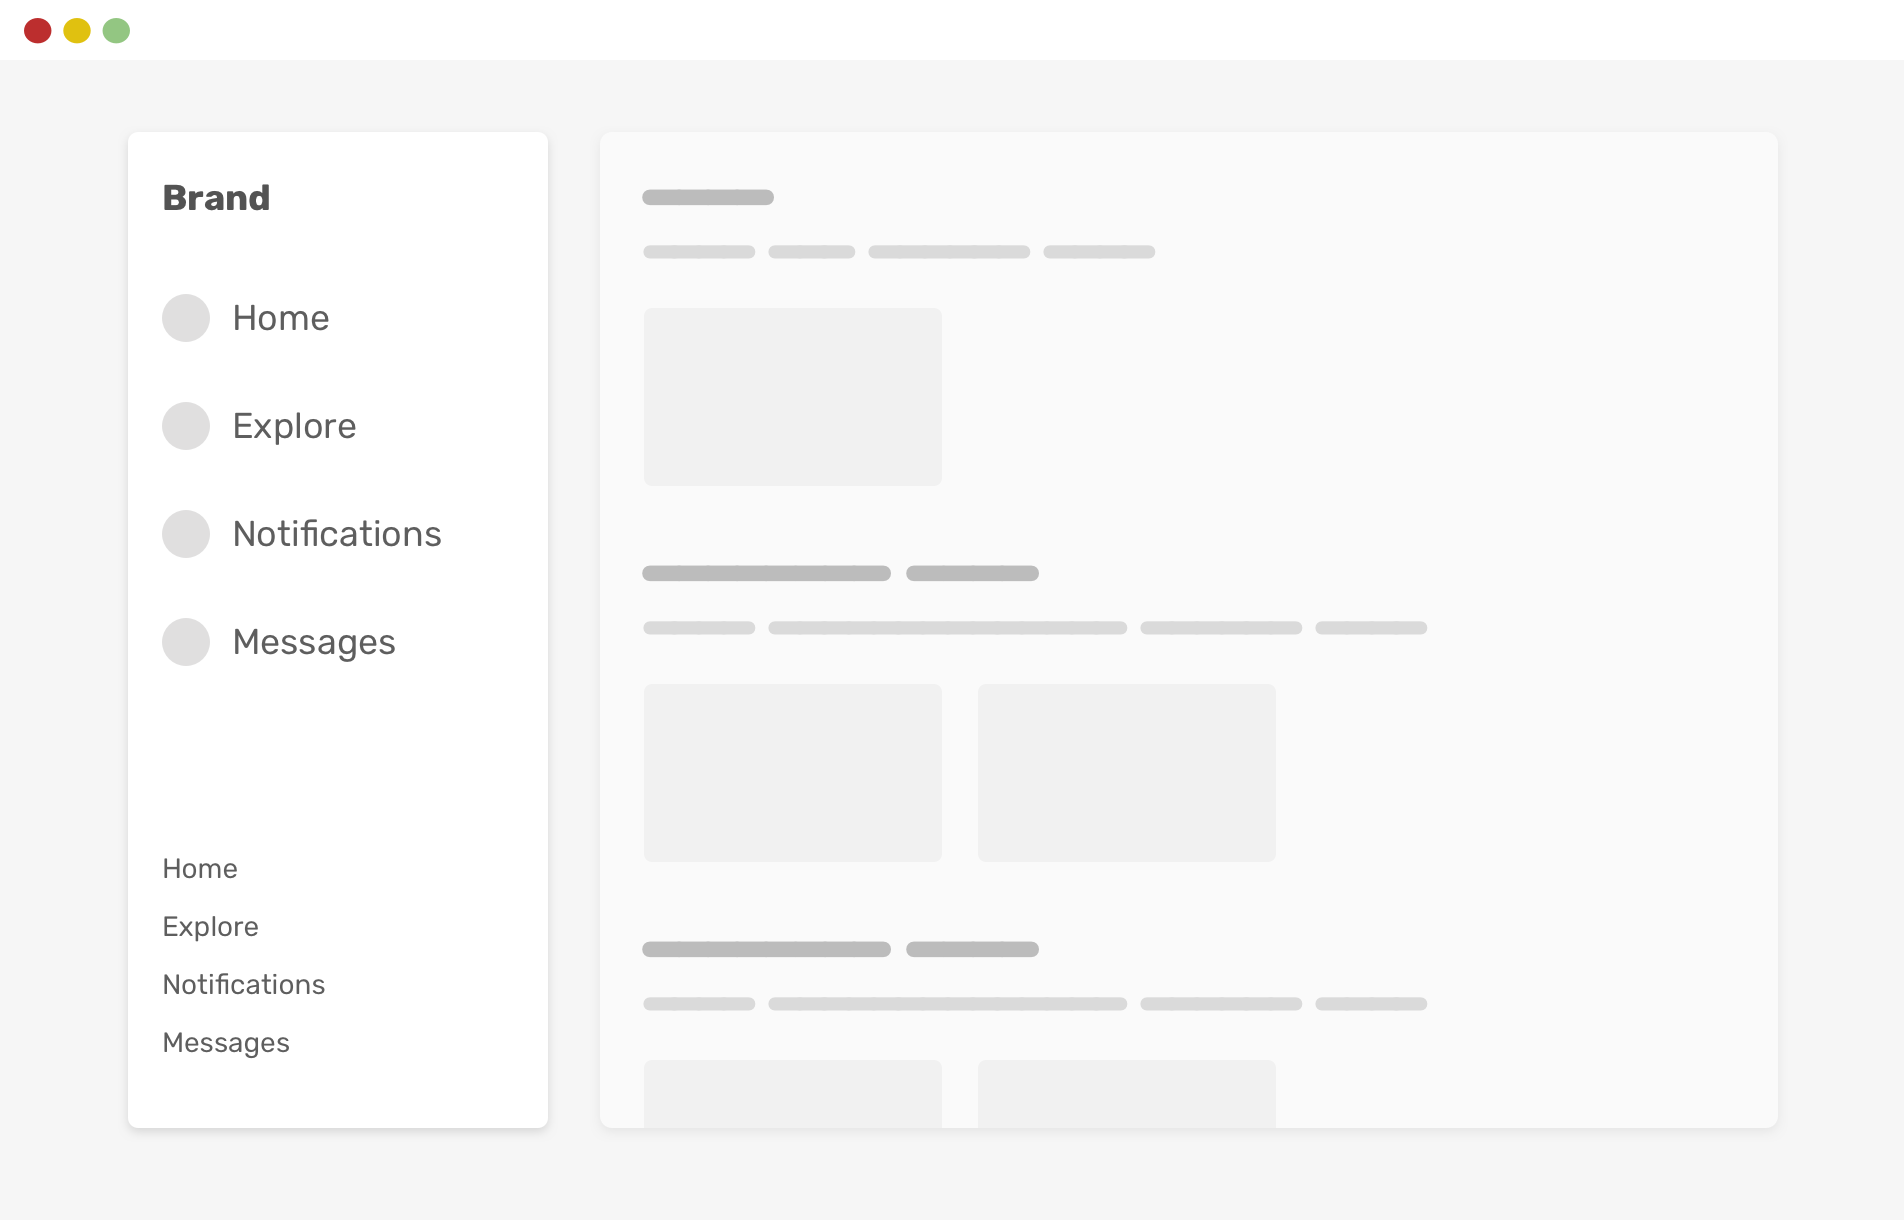
Sometimes, it’s so tempting to build a component and only test by resizing the browser’s width. Testing against the browser’s height can reveal some interesting problems.

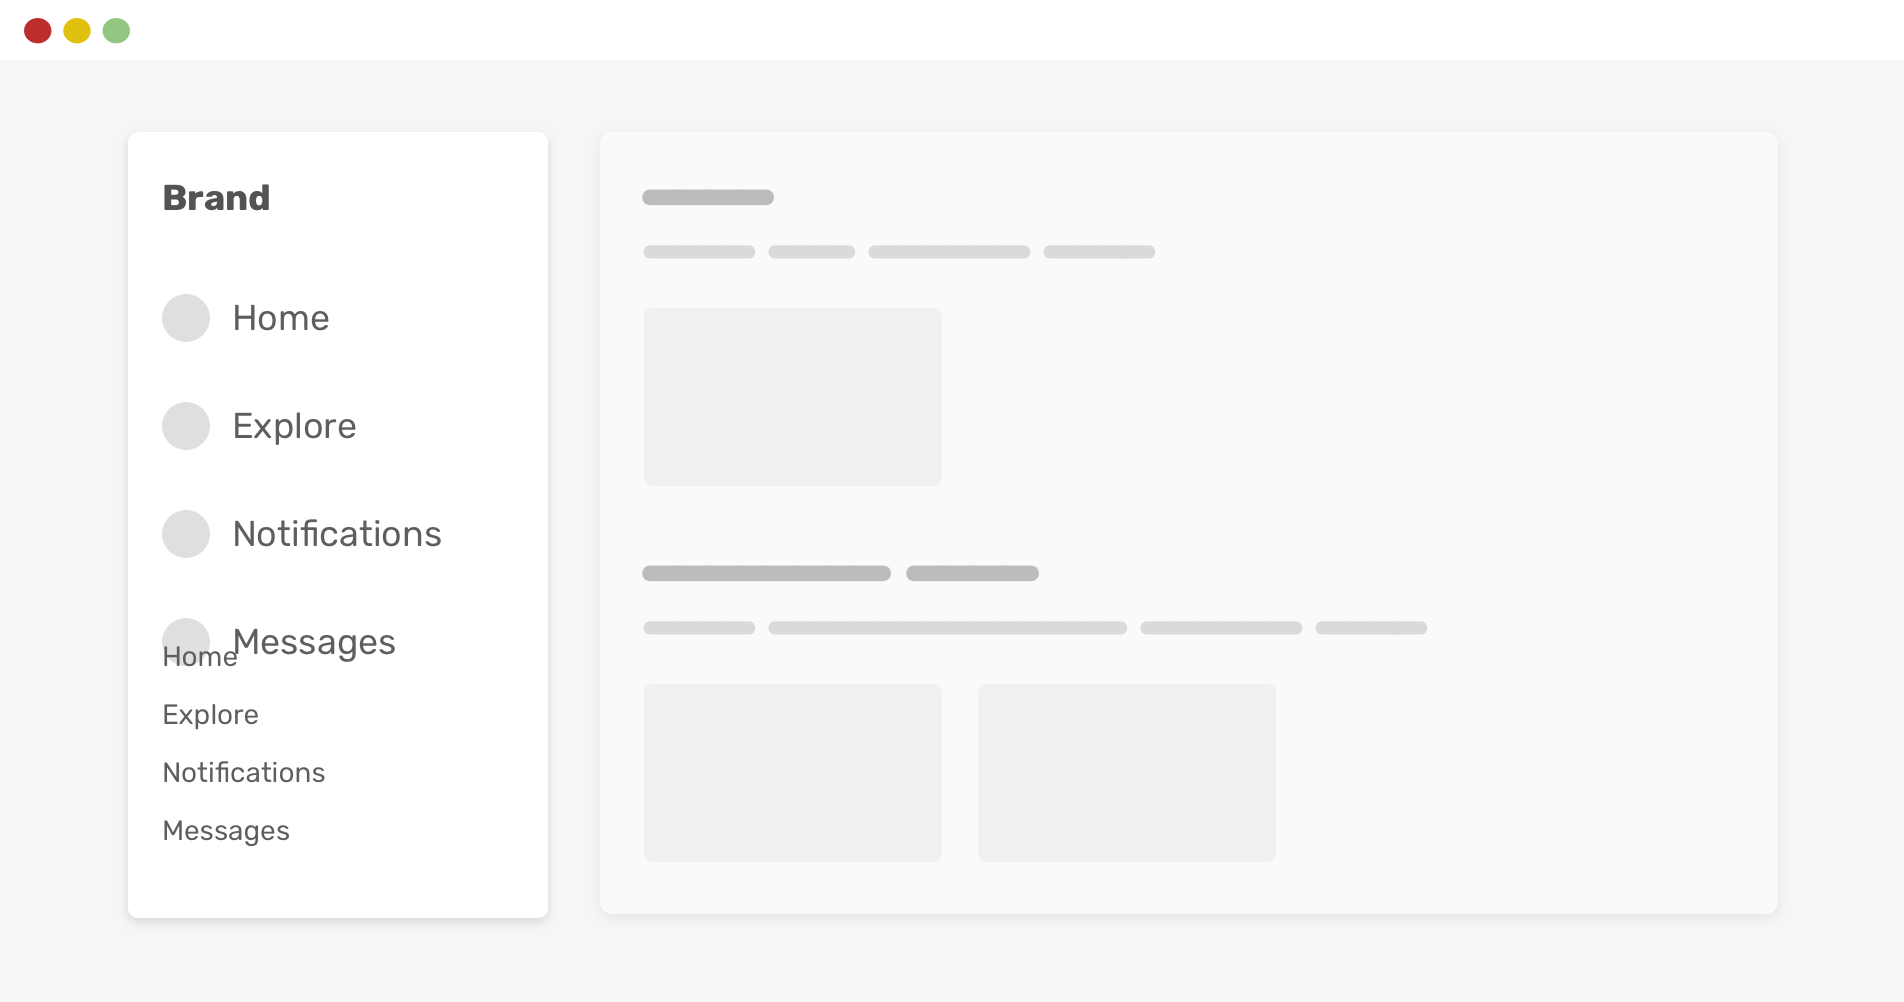
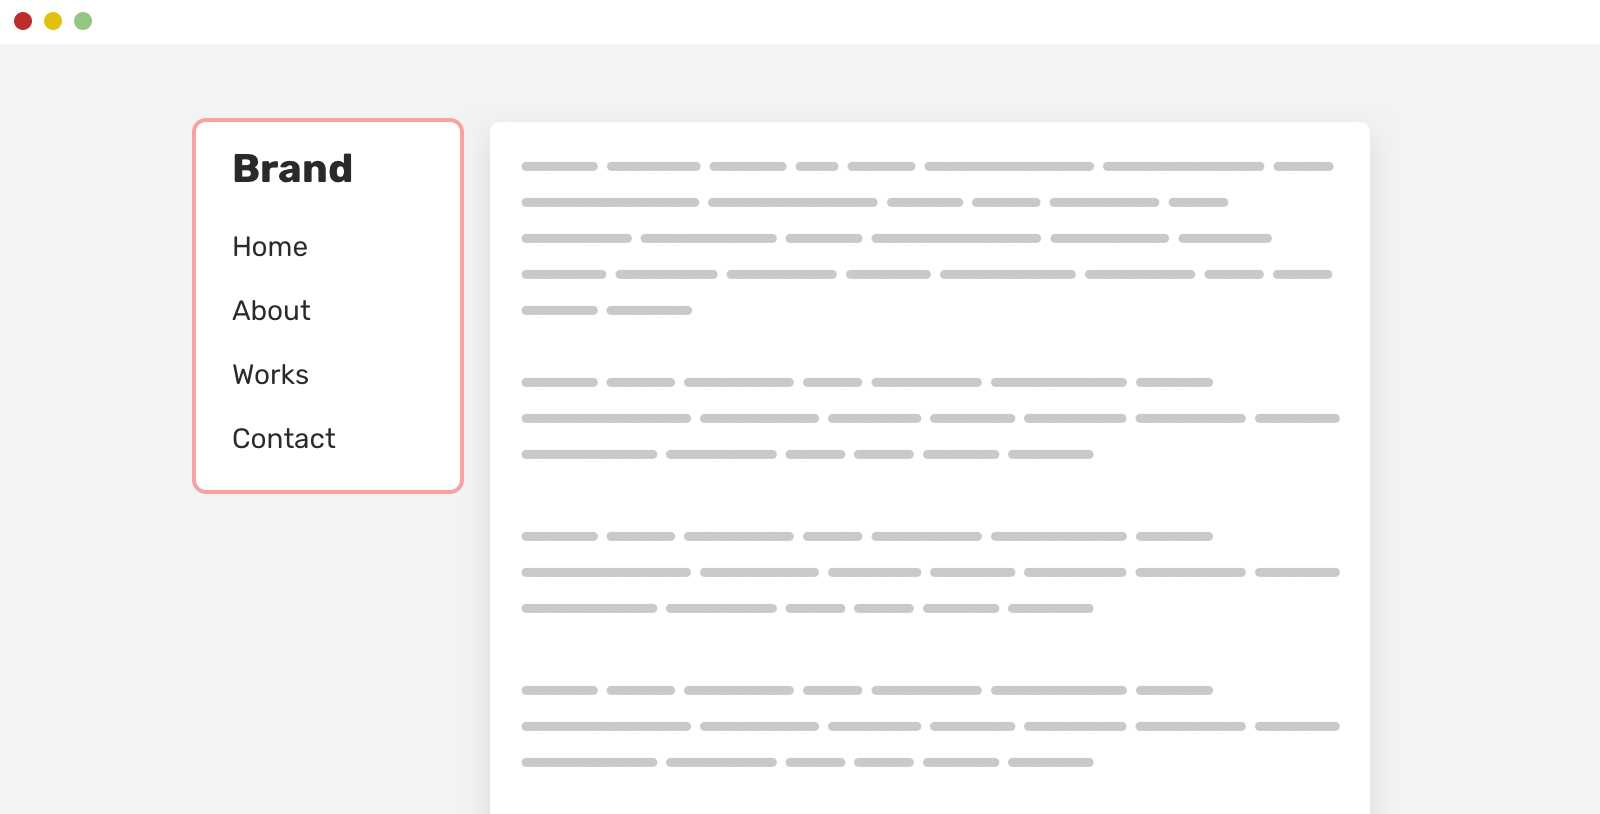
Here is one that I’ve seen multiple times. We have an aside component with main and secondary links. The secondary links should be positioned at the very bottom of the aside section.

Consider the following example. The main and secondary navigation looks okay. In the example that I saw, the developer added position: sticky to the secondary navigation so that it can stick to the bottom.

However, if the browser height is smaller, things will break. Notice how the two navigations are overlapped.

By using CSS vertical media queries, we can avoid that issue.

That way, the secondary navigation will only be sticked to the bottom if the viewport height is larger than or equals 600px. Much better, right?

There are probably better ways to implement that behavior (like using margin-auto) but I’m focusing on the vertical query for this example.

If I want to explain using CSS vertical media query, I need to write a full article about it. The good news is that I already wrote one, in case you’re interested.

Text over image

20 avril 2022 à 02:00

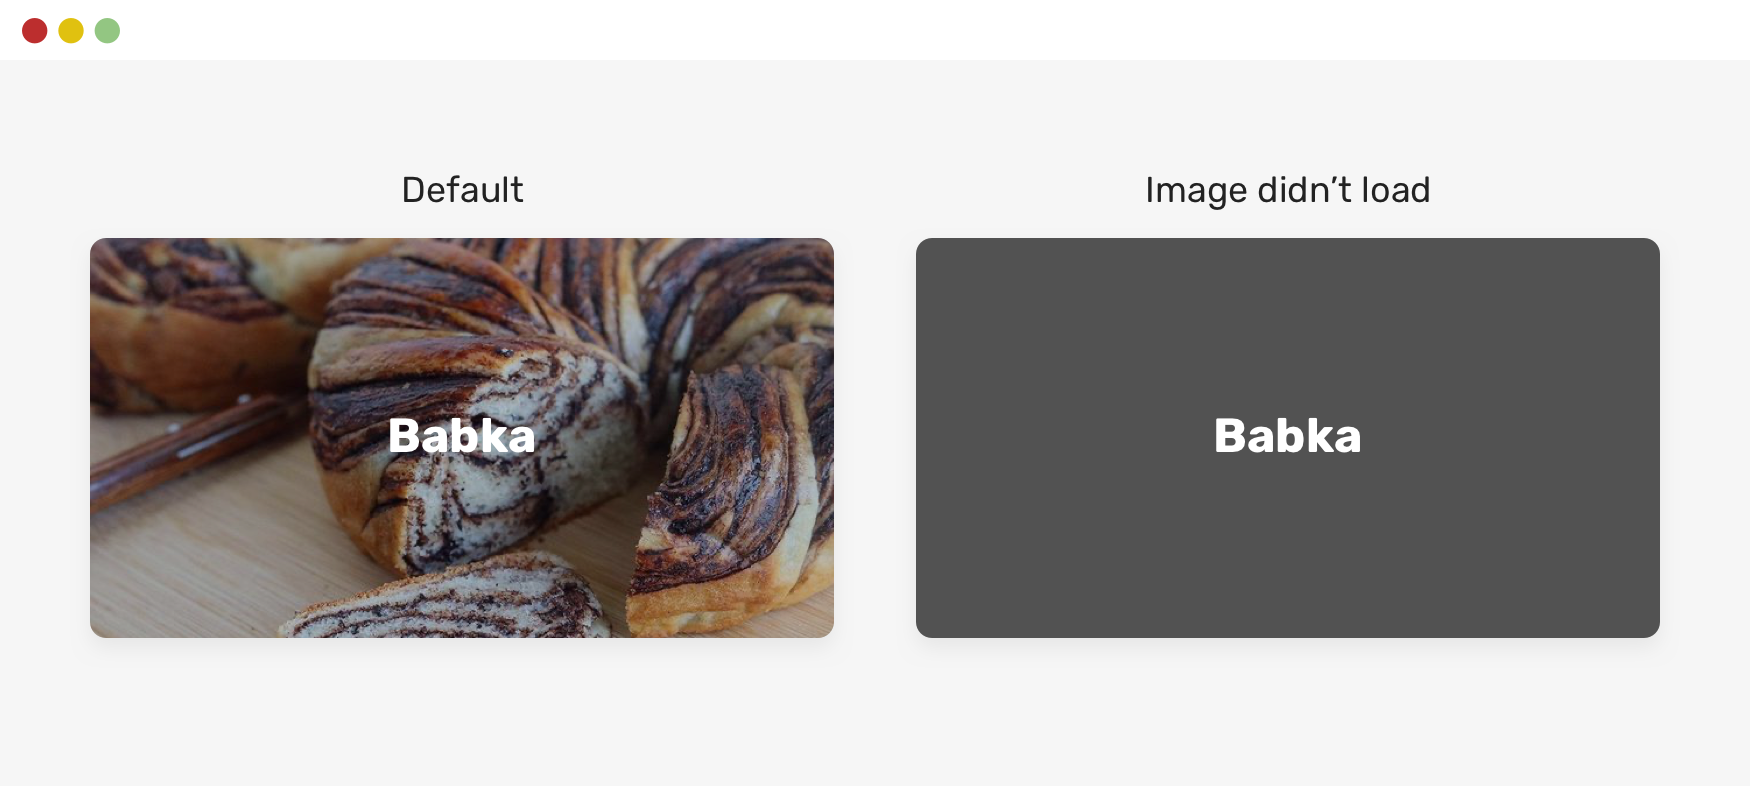
When using the text over an imaging approach, it’s important to account for the case where the image fails to load. How the text will look like?

Here is an example.

The text looks readable, but when the image fails to load, it won’t.

We fix that easily by adding a background color to the <img> element. This background will only be visible if the image fails to load. Isn’t that cool?

.card__img {
background-color: grey;
}

Using space-between

20 avril 2022 à 02:00

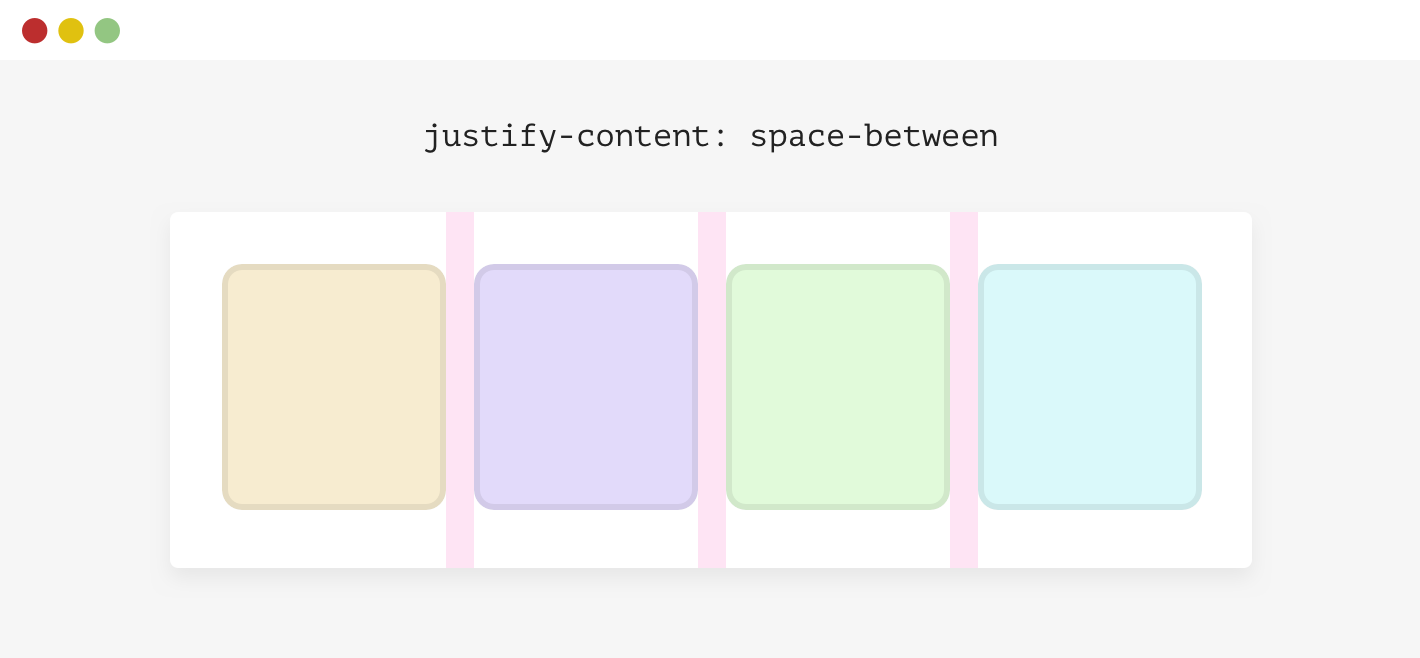
In a flex container, you might use justify-content to space the child items from each other. With a certain number of child items, the layout will look okay. However, when they increase or decrease, the layout will look odd.

Consider the following example.

We have a flex container with four items. The spacing between each item isn’t a gap or margin, it’s there because the container has justify-content: space-between.

.wrapper {
display: flex;
flex-wrap: wrap;
justify-content: space-between;
}

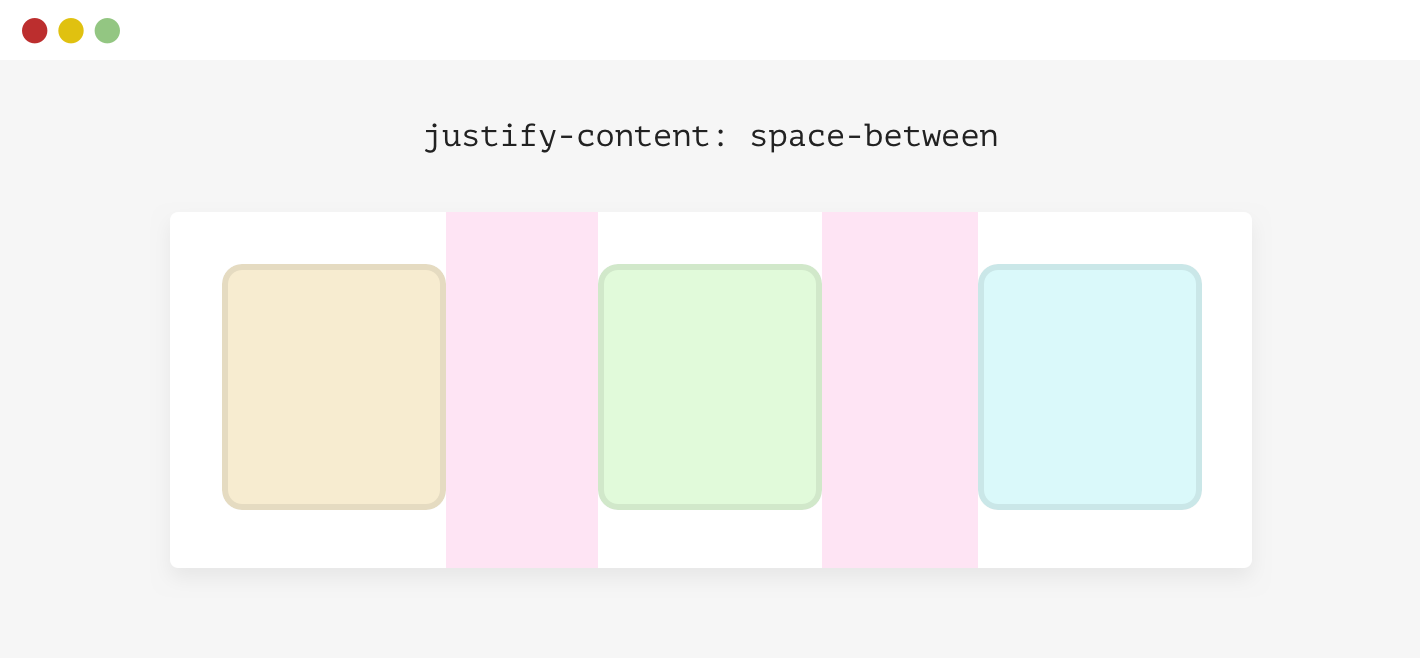
When the number of items is less than four, here is what will happen.

This isn’t good. There are different solutions to this:

  • Margin
  • Flexbox gap (Use with caution)
  • Padding (Can be applied to the parent of each child element)
  • Adding empty elements to act as a spacer.

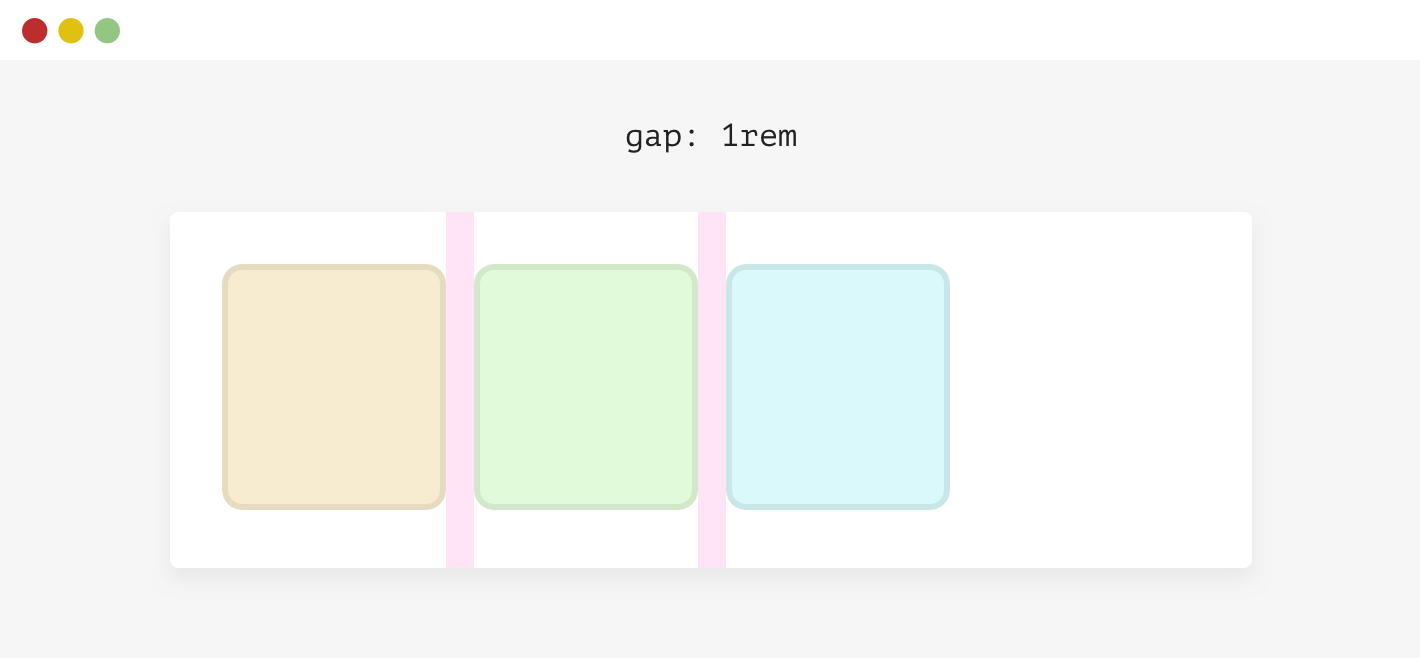
For simplicity, I will use gap.

.wrapper {
display: flex;
flex-wrap: wrap;
gap: 1rem;
}

Examples and use cases

Scrollbars on demand

20 avril 2022 à 02:00

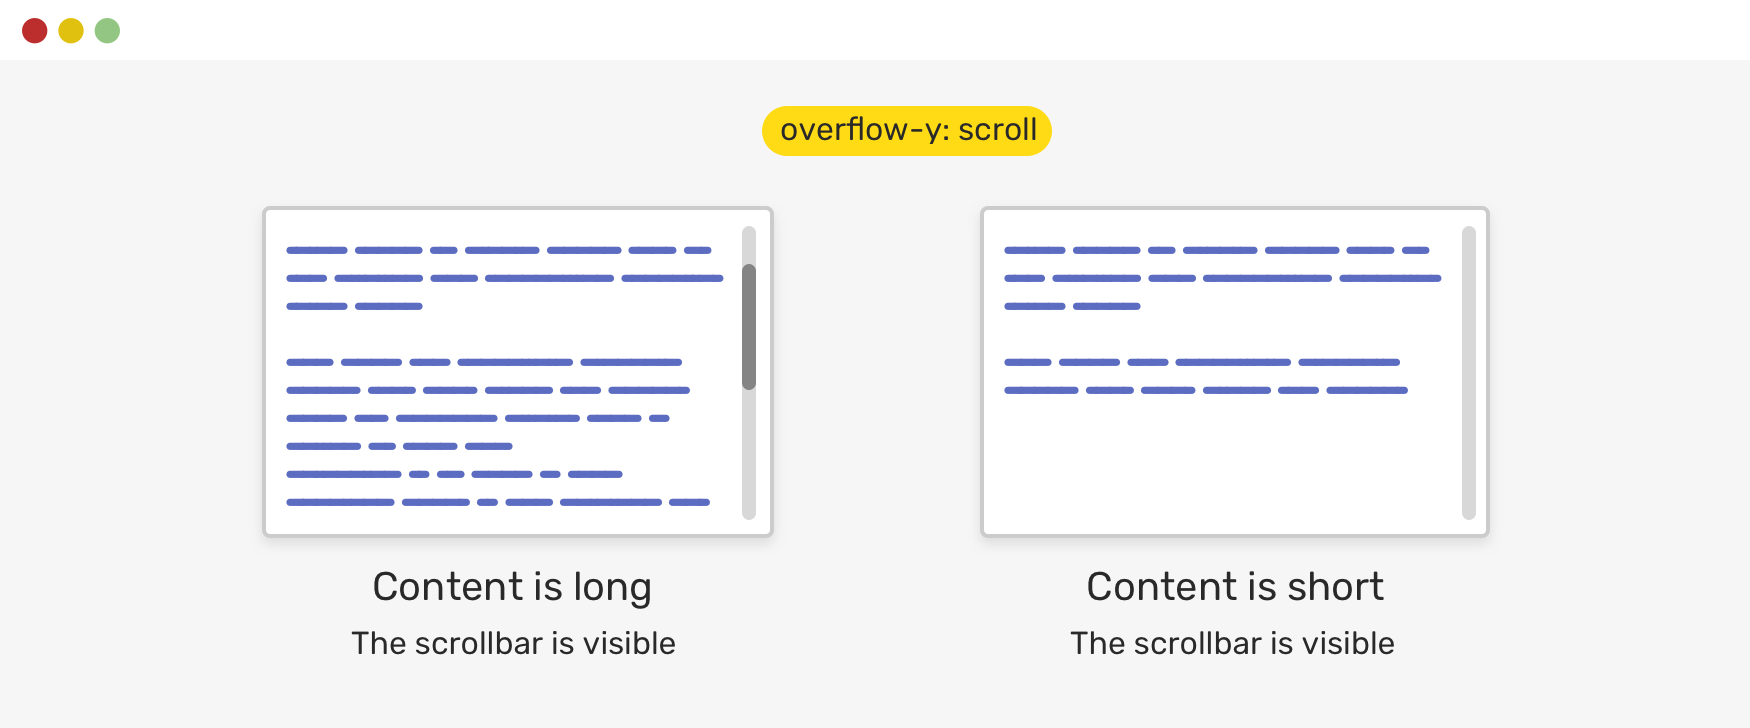
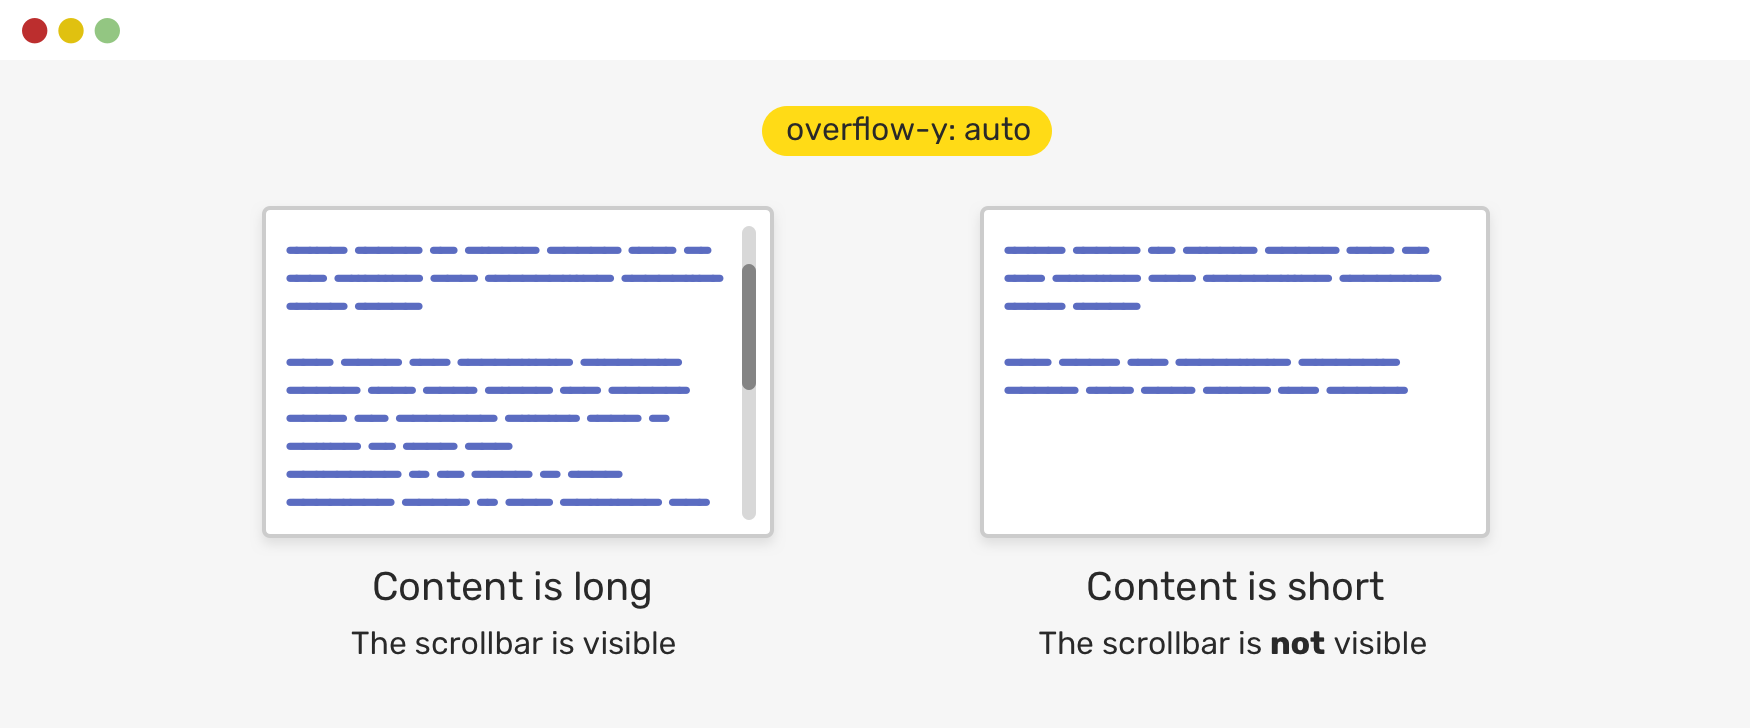
Luckily, we can control to show a scrollbar or not only in the case of having a long content. That being said, it’s highly recommended to use auto as a value for overflow.

Consider the following example.

Notice how even if the content is short, there is a scrollbar visible. This isn’t good for a UI. As a designer, it’s just confusing to see a scrollbar when it’s not needed.

.element {
overflow-y: auto;
}

With overflow-y: auto, the scrollbar will only be visible if the content is long. Otherwise, it won’t be there. Here is an updated figure.

Examples and use cases

For macOS users, the scrollbar is shown only on scroll. You can change that in the settings via "System Preferences -> General -> Show scroll bars -> Always".

Lorem ipsum, dolor sit amet consectetur adipisicing elit. Doloremque harum est eum aperiam sed ut soluta quia nisi asperiores autem. Corporis consectetur amet sapiente necessitatibus veritatis aut quia maiores. Enim.

Scrollbar gutter

20 avril 2022 à 02:00

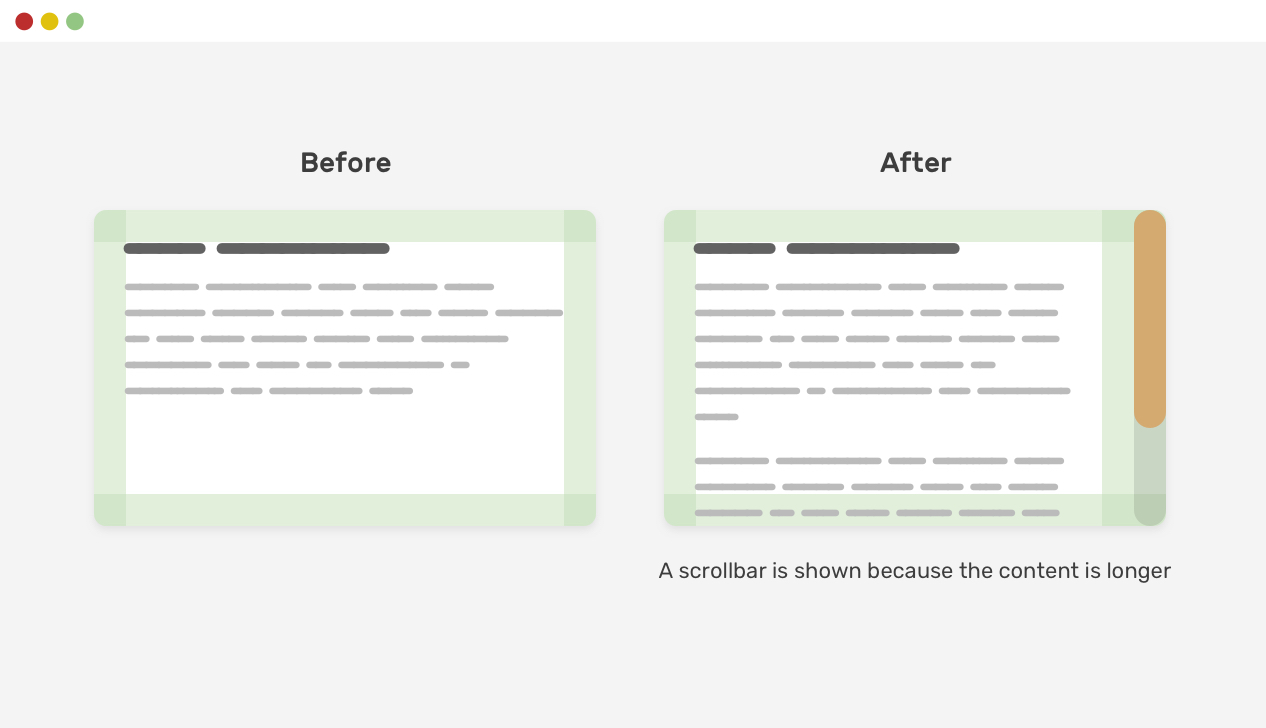
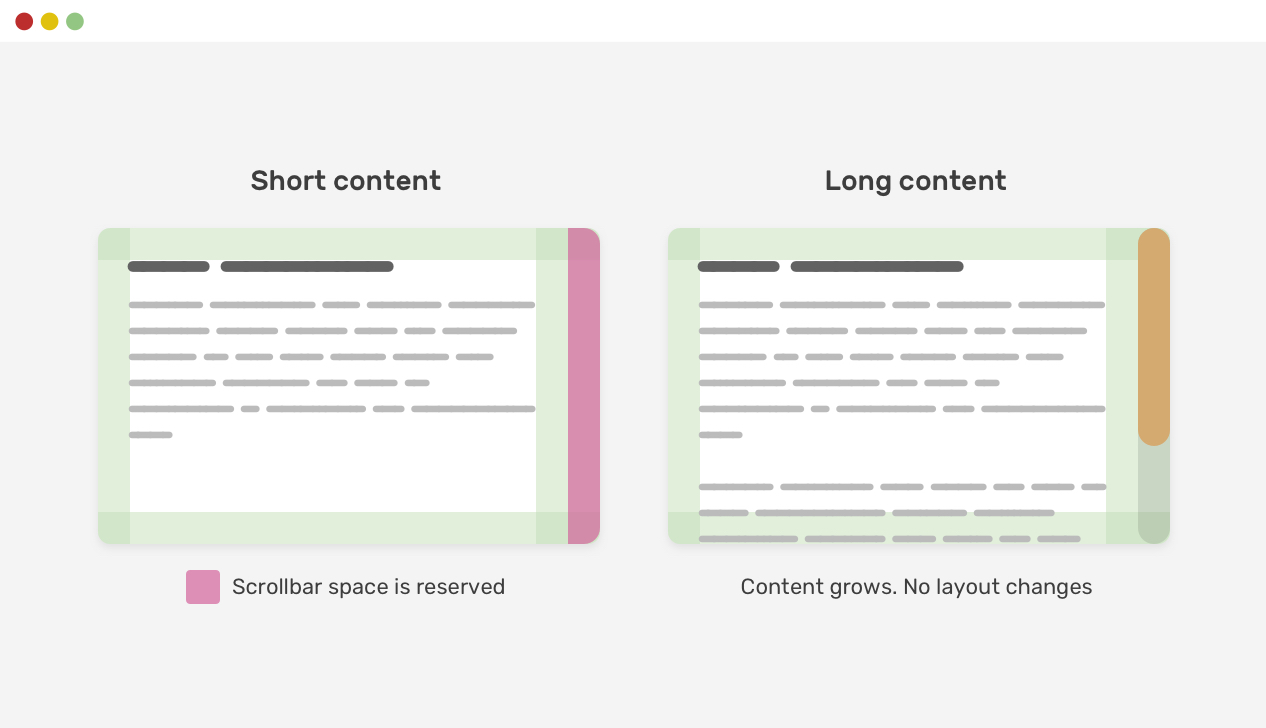
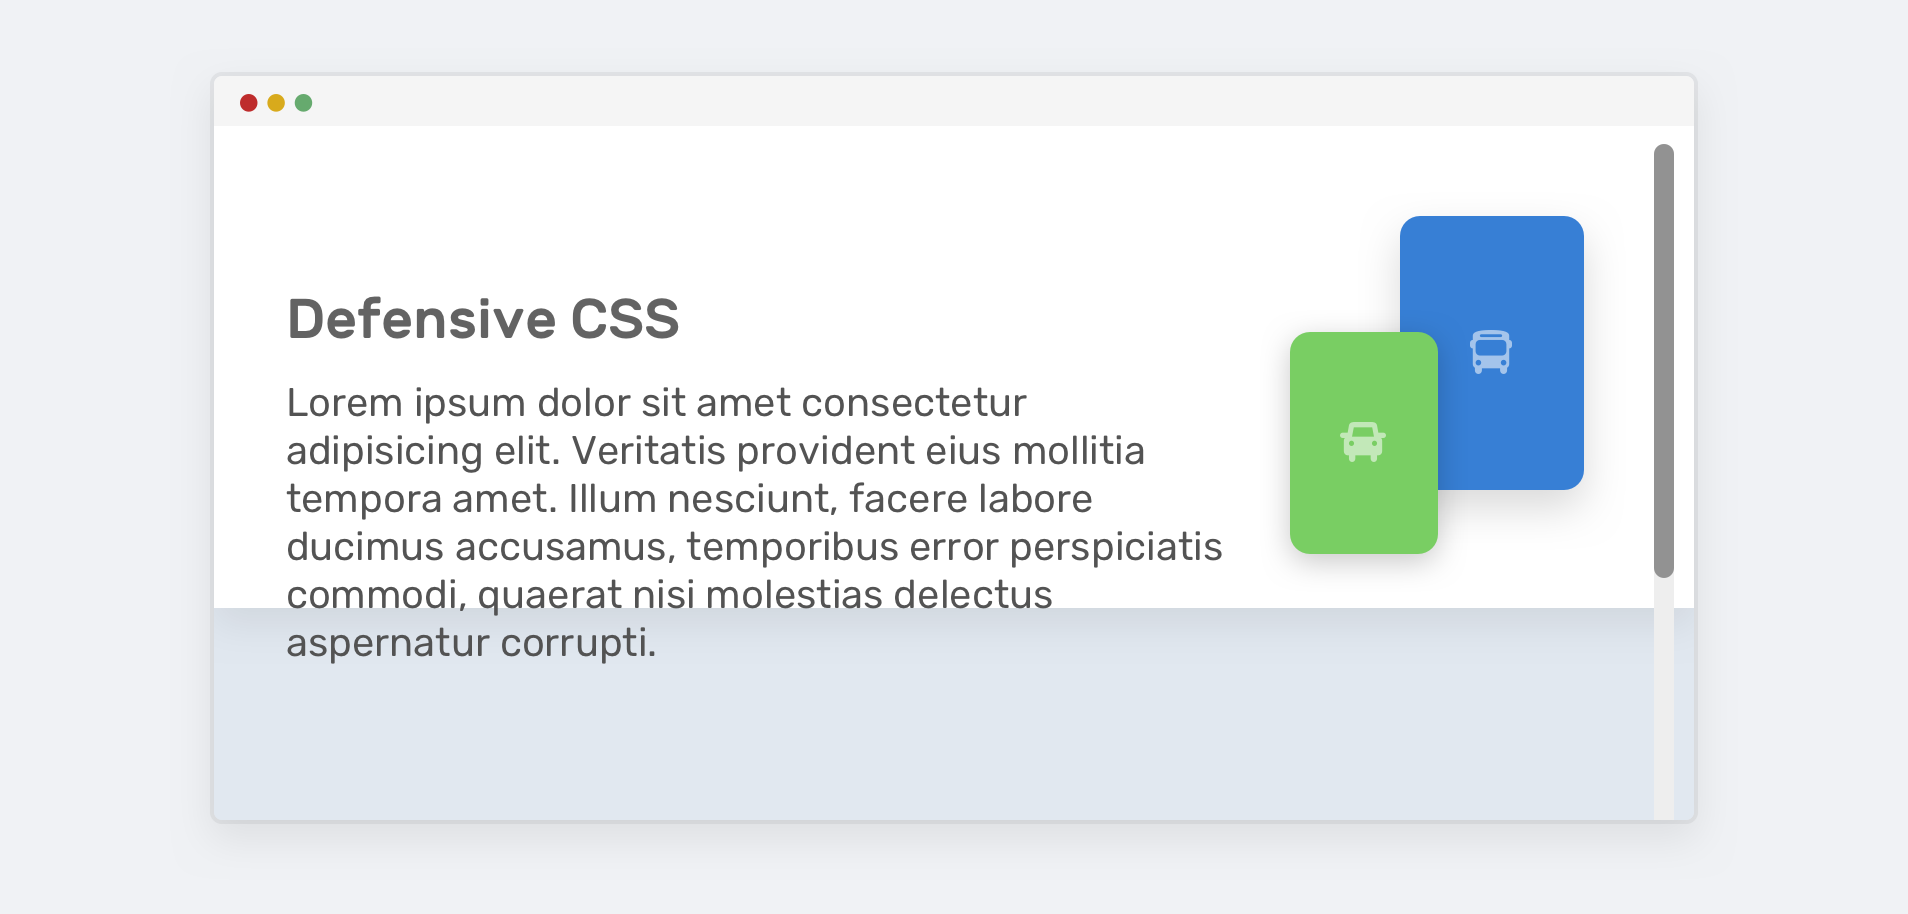
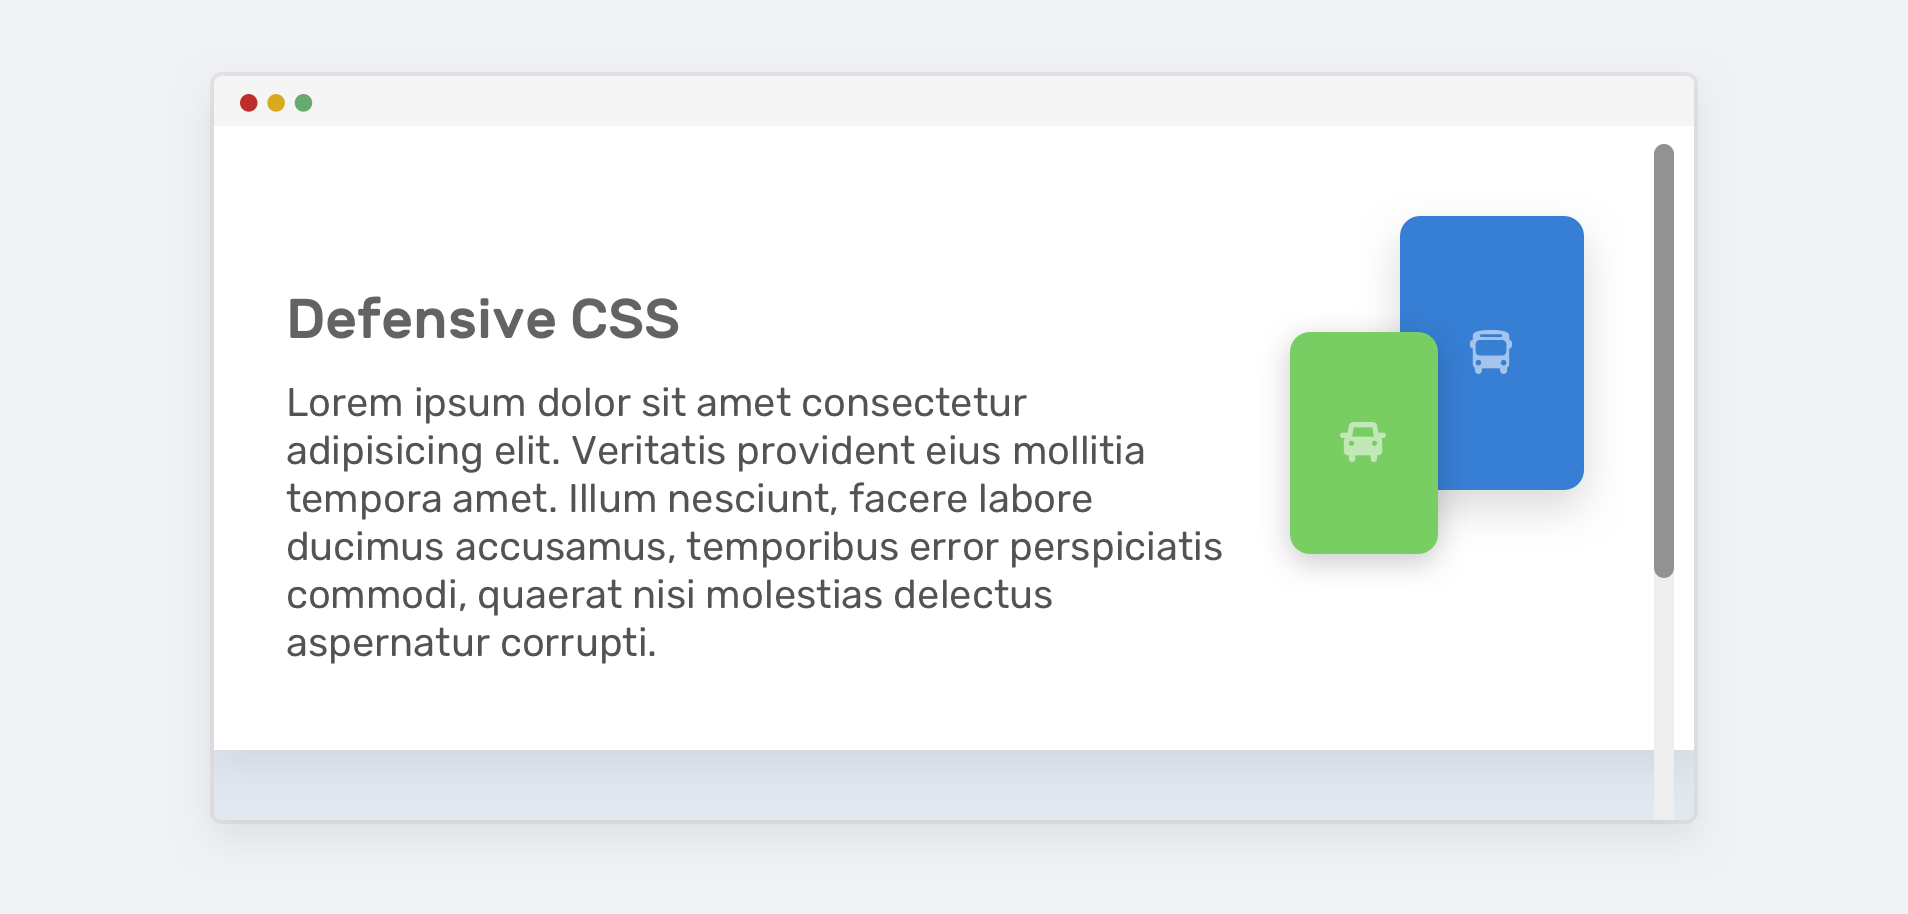
Another thing that is related to scrolling is the scrollbar gutter. Taking the previous example, when the content gets longer, adding a scrollbar will cause a layout shift. The reason the layout shift happens is to reserve a space for the scrollbar.

Consider the following figure.

Notice how the content shifted when it became longer as a result of showing a scrollbar. We can avoid that behavior by using the scrollbar-gutter property.

.element {
scrollbar-gutter: stable;
}

Checkout the following interactive demo on Codepen.

See the Pen Scrollbar Gutter - Demo by Ahmad Shadeed (@shadeed) on CodePen.

Related articles

Scroll chaining

20 avril 2022 à 02:00

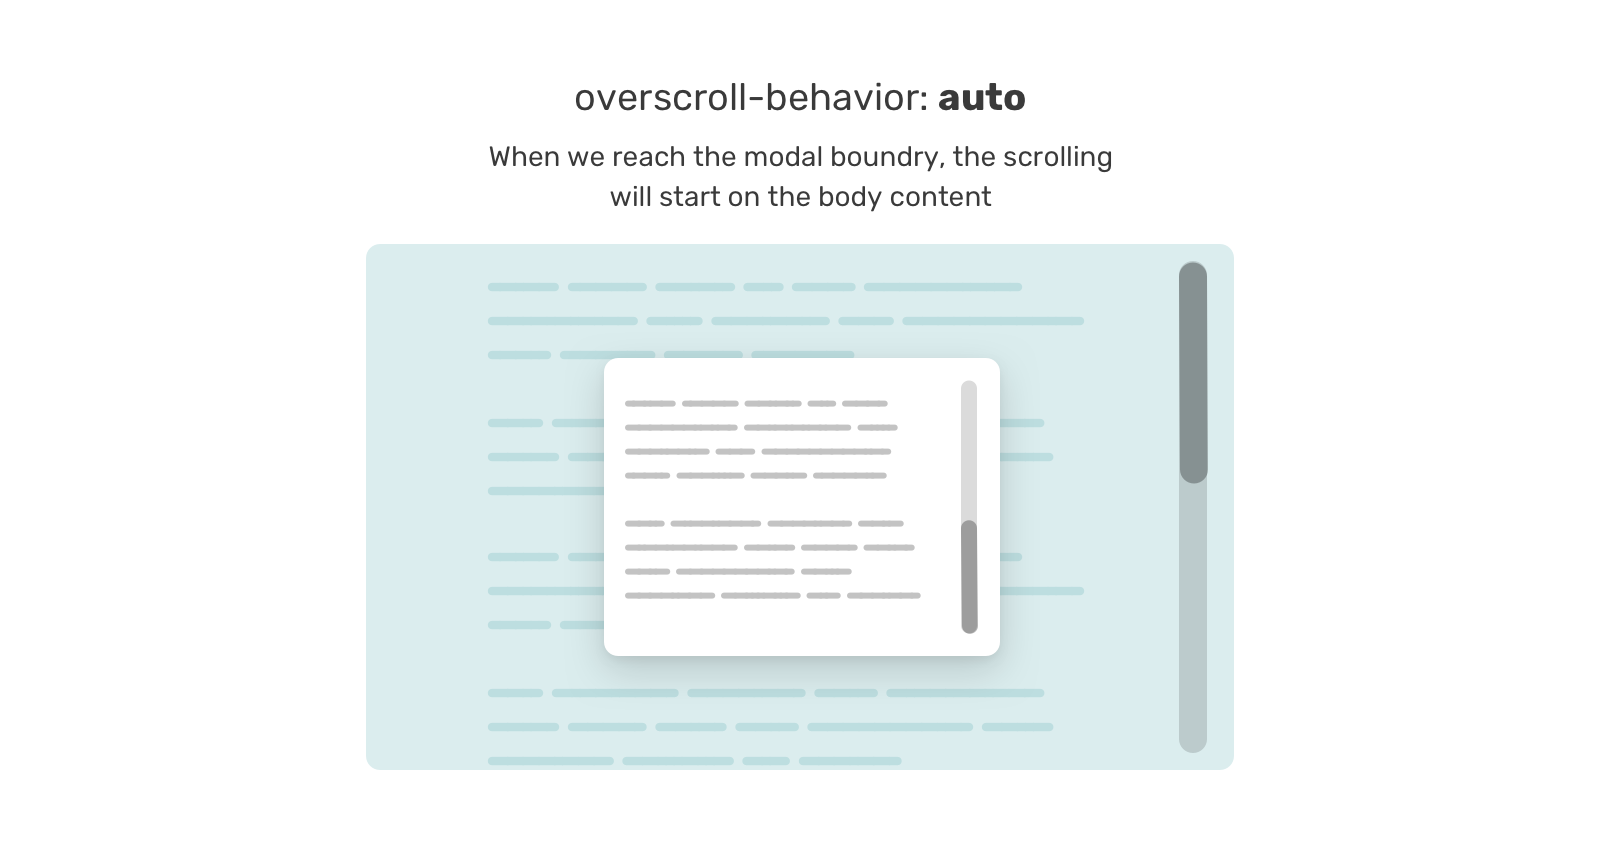
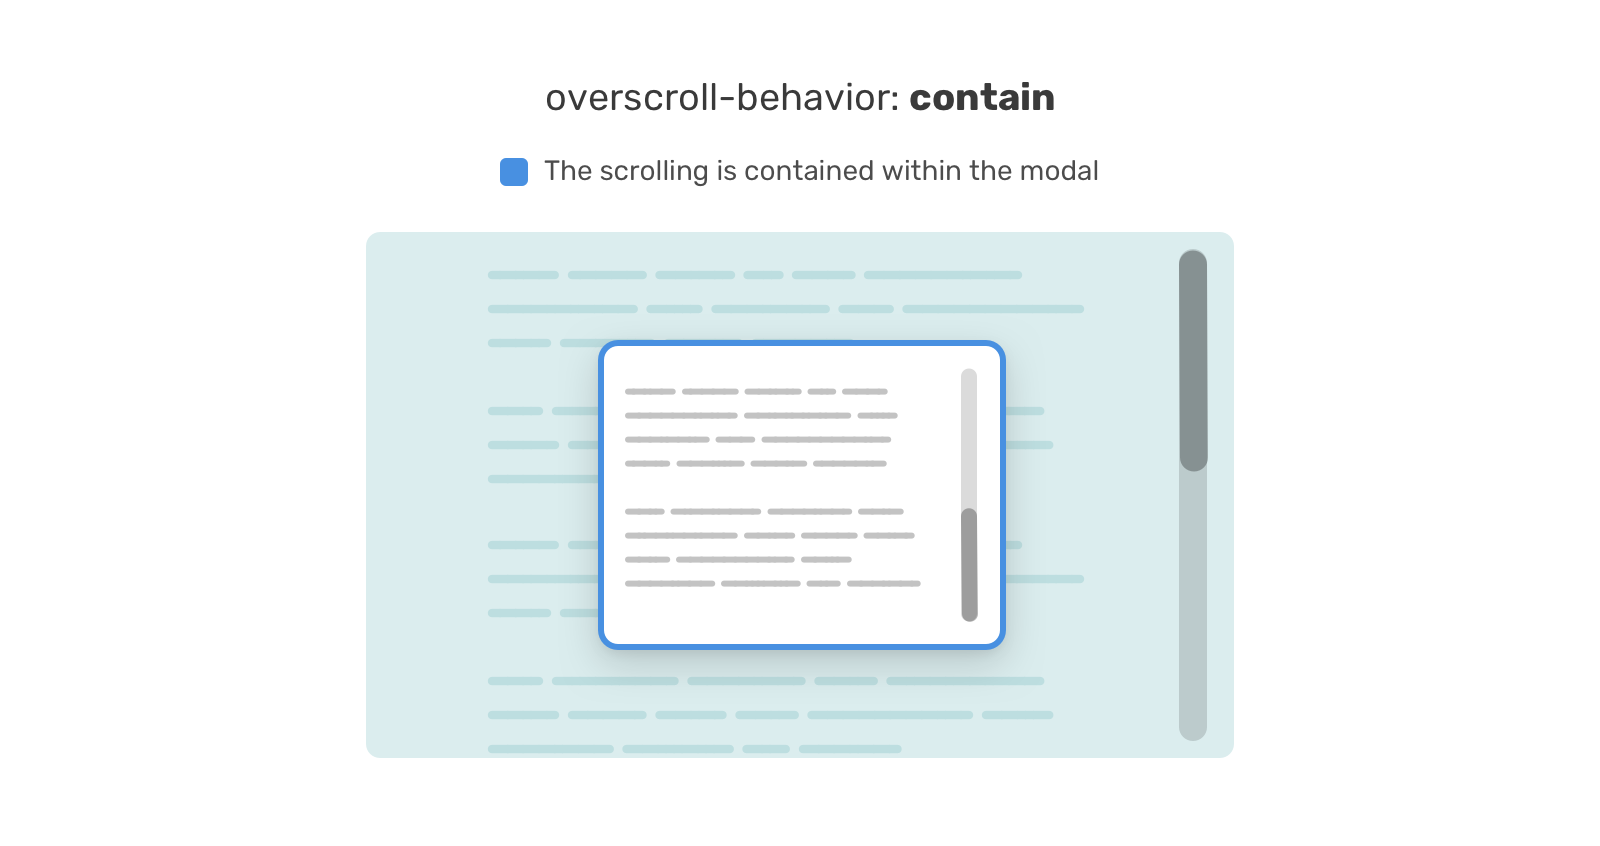
Have you ever opened a modal and started scrolling, and then when you reach the end and keep scrolling, the content underneath the modal (the body element) will scroll? This is called scroll chaining.

There have been a few hacks to make this work in the past years, but now, we can do that with CSS only, thanks to the ‌overscroll-behavior CSS property.

In the following figure, you see the default scroll chaining behavior.

To avoid that ahead of time, we can add that to any component that needs to scroll (e.g: chat component, mobile menu.. etc). The nice thing about this property is that it won’t have an effect until there is scrolling.

.modal__content {
overscroll-behavior-y: contain;
overflow-y: auto;
}

Examples and use cases

Scroll chaining

In this example, try to scroll the modal and you will notice that the body scrolled once you view all the modal content. This is called scroll chaining.

Thankfully, we can solve now with CSS. Try to toggle the checkbox and try scrolling again!

.modal__body {
overscroll-behavior-y: contain;
overflow-y: auto;
}

Lorem ipsum, dolor sit amet consectetur adipisicing elit. Doloremque harum est eum aperiam sed ut soluta quia nisi asperiores autem. Corporis consectetur amet sapiente necessitatibus veritatis aut quia maiores. Enim.

Title

Lorem ipsum dolor sit amet consectetur adipisicing elit. Tempora dignissimos unde, officia et nulla quasi consectetur ipsam architecto labore. Quod qui eum accusamus cumque pariatur fugiat dolores ad, aspernatur excepturi!

Lorem ipsum dolor sit amet consectetur, adipisicing elit. Ratione non nostrum, ducimus velit excepturi dolor veniam delectus quibusdam, alias voluptas assumenda. Nesciunt optio consequatur consectetur in natus quod ad quisquam.

In case you want to learn more about it, I wrote a detailed article on that.

Position sticky with CSS Grid

20 avril 2022 à 02:00

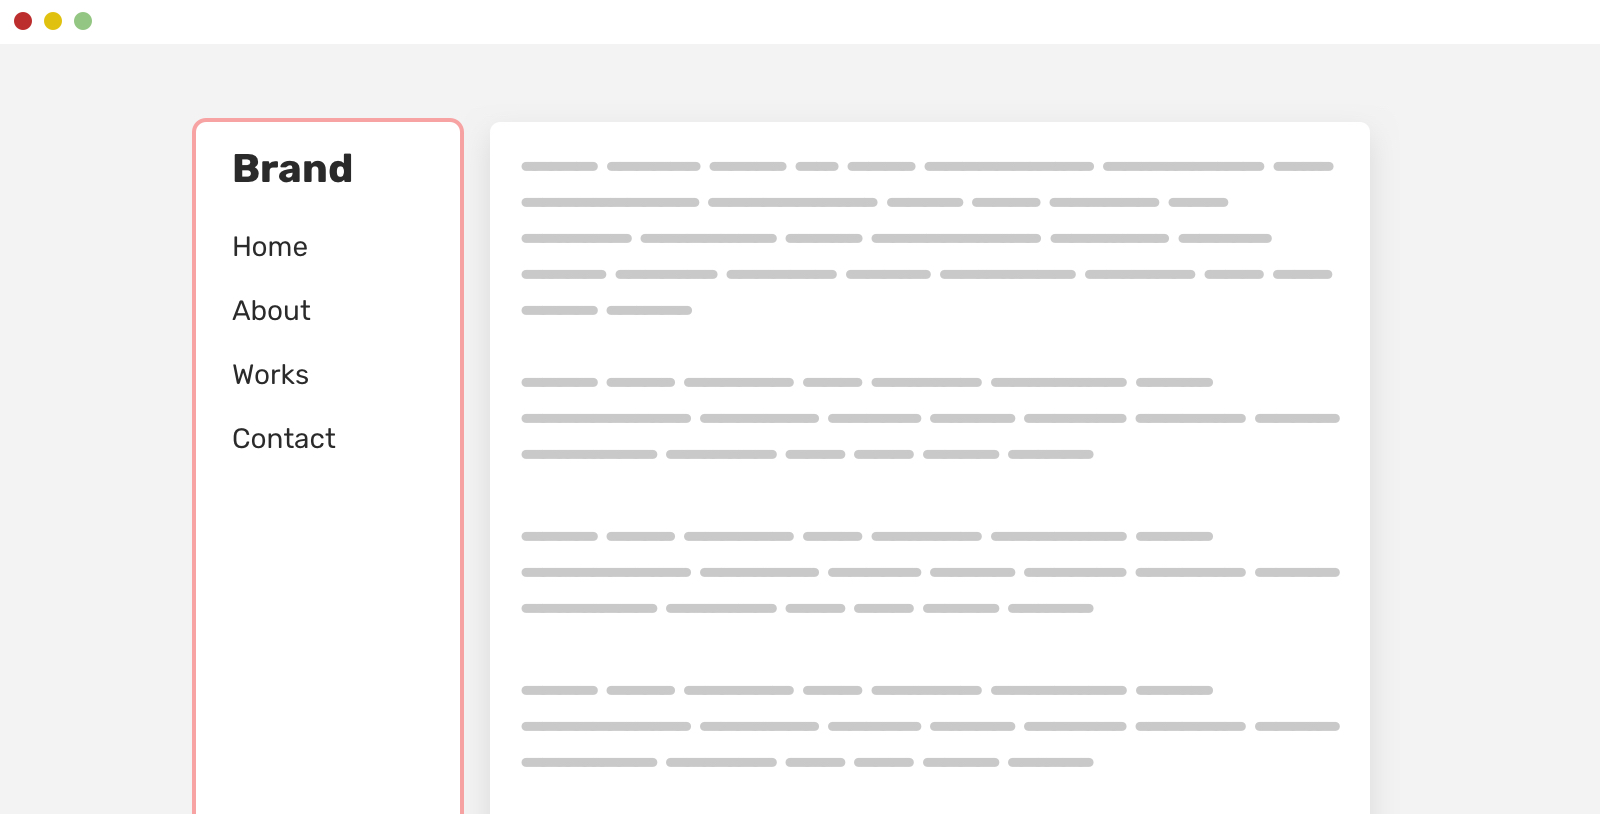
Have you ever tried using position: sticky with a child of a grid container? The default behavior for grid items is to stretch. As a result, the aside element in the example below is equal to the main section height.

To make it work as expected, you need to reset align-self property.

aside {
align-self: start;
position: sticky;
top: 1rem;
}

I wrote about that topic in detail on my blog, if you're interested.

Examples and use cases

Main and Aside

Title

Lorem ipsum dolor sit amet consectetur adipisicing elit. Saepe corporis iure, quo asperiores sequi aspernatur odio adipisci, eligendi, unde provident mollitia sed deleniti! Nisi, facilis hic voluptatibus excepturi autem sequi!

Title

Lorem ipsum dolor sit amet consectetur adipisicing elit. Saepe corporis iure, quo asperiores sequi aspernatur odio.

Aside

Image maximum width

20 avril 2022 à 02:00

As a general rule them, don't forget to set max-width: 100% to all images. This can be added to the CSS reset that you use.

img {
max-width: 100%;
object-fit: cover;
}

Examples and use cases

Image

Grouping vendor selectors

20 avril 2022 à 02:00

It's not recommended to group selectors that are meant to work with different browsers. For example, styling an input's placeholder needs multiple selectors per the browser. If we group the selectors, the entire rule will be invalid, according to w3c.

/* Don't do this, please */
input::-webkit-input-placeholder,
input:-moz-placeholder
{
color: #222;
}

Instead, do this.

input::-webkit-input-placeholder {
color: #222;
}

input:-moz-placeholder {
color: #222;
}

Minimum Content Size In CSS grid

20 avril 2022 à 02:00

Similar to flexbox, CSS grid has a default minimum content size for its child items which is auto. That means, if there is an element that is larger than the grid item, it will overflow.
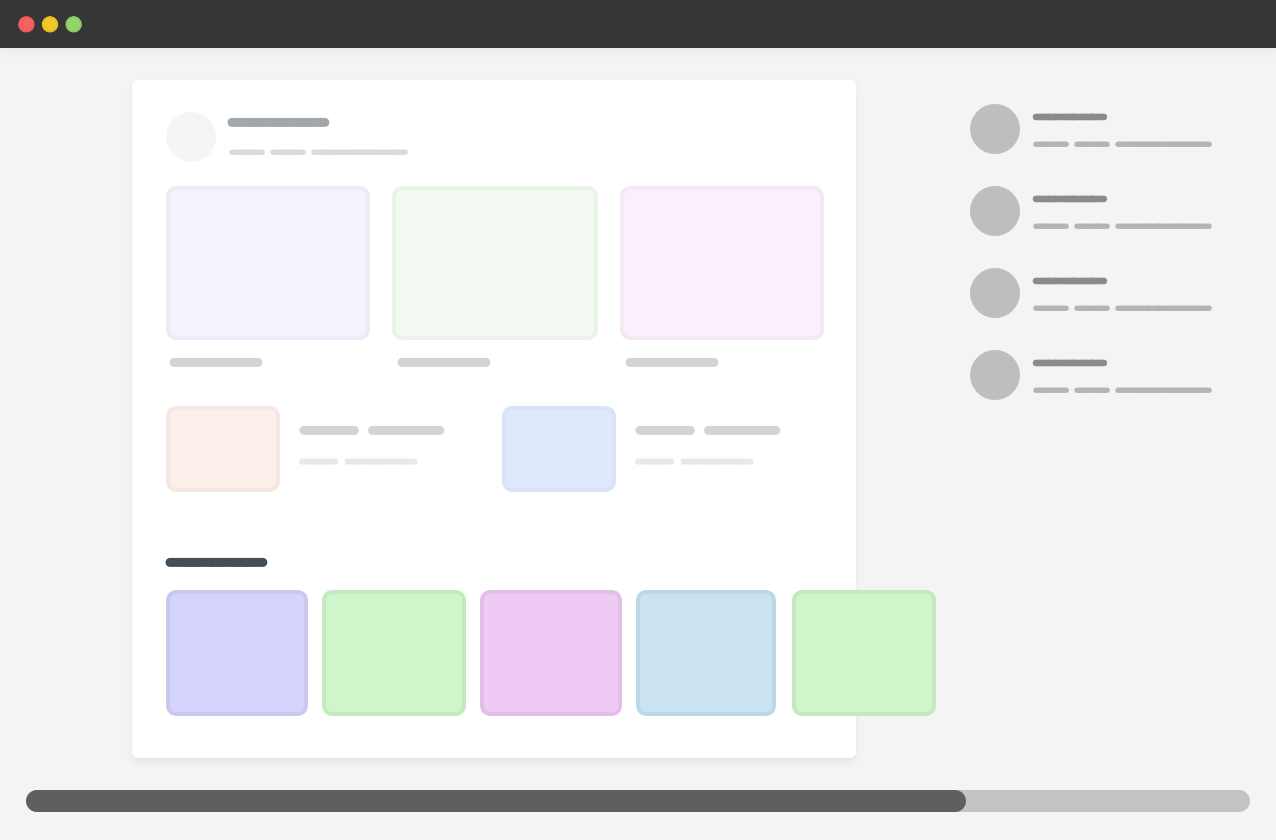
In the example above, we have a carousel within the main section. For context, here is the HTML and CSS.

<div class="wrapper">
<main>
<section class="carousel"></section>
</main>
<aside></aside>
</div>
@media (min-width: 1020px) {
.wrapper {
display: grid;
grid-template-columns: 1fr 248px;
grid-gap: 40px;
}
}

.carousel {
display: flex;
overflow-x: auto;
}

Since the carousel is a flex container that doesn’t wrap, its width is larger than the main section, and thus the grid item respected that. As a result, there is horizontal scrolling.

To fix that, we have three different solutions:

  • Using minmax()
  • Applying min-width to the grid item
  • Adding overflow: hidden to the grid item

As a defensive CSS mechanism, it doesn't matter which solution to pick, but for this example I will go with the min-width one.
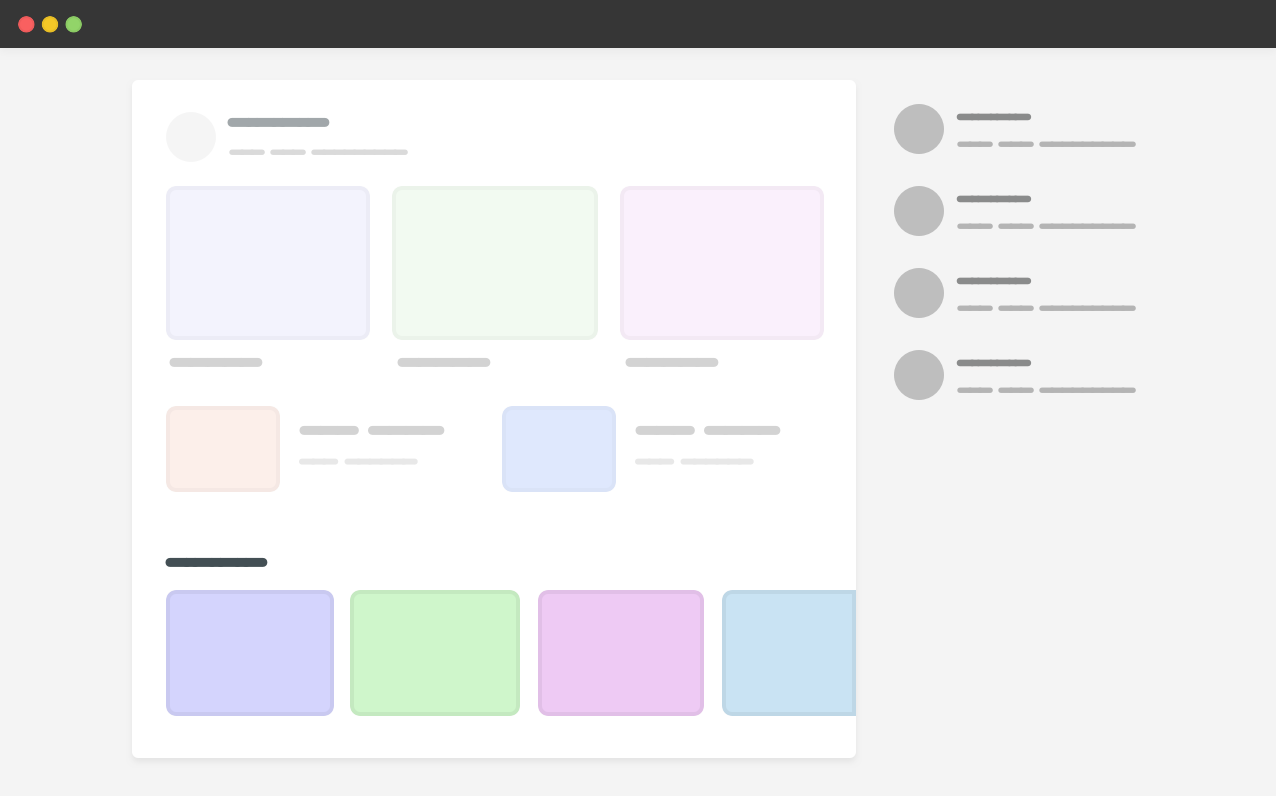
I wrote about that in more detail. I also highly recommend checking "Preventing a Grid Blowout" and "You want minmax(10px, 1fr) not 1fr" by Chris Coyier.

Examples and use cases

Main and aside

Based on the previous illustrated demo, we have a page that contains a main and an aside sections. The main section has a scrollable element (a carousel).

<div class="page">
<div class="page__item page__item--main">
<div class="slider">
<div class="slider__item"></div>
<!-- more items -->
</div>
</div>
<div class="page__item page__item--aside"></div>
</div>
.slider {
display: flex;
}

.page {
display: grid;
grid-template-columns: 1fr 100px;
grid-gap: 1rem;
}

The element .page__item--main is a grid item, and when the .slider doesn't wrap its child items, the main grid item will expand to fit all the slider items.

To overcome that, we can pick one of the solutions mentioned above. For this example, I will pick min-width: 0.

Aside

Try to click the "Toggle Defensive" option to see the solution in action.

.page__item--main {
/* prevent the grid item from respecting the
* minimum content size
*/

min-width: 0;
}

Minimum Content Size In CSS Flexbox

20 avril 2022 à 02:00

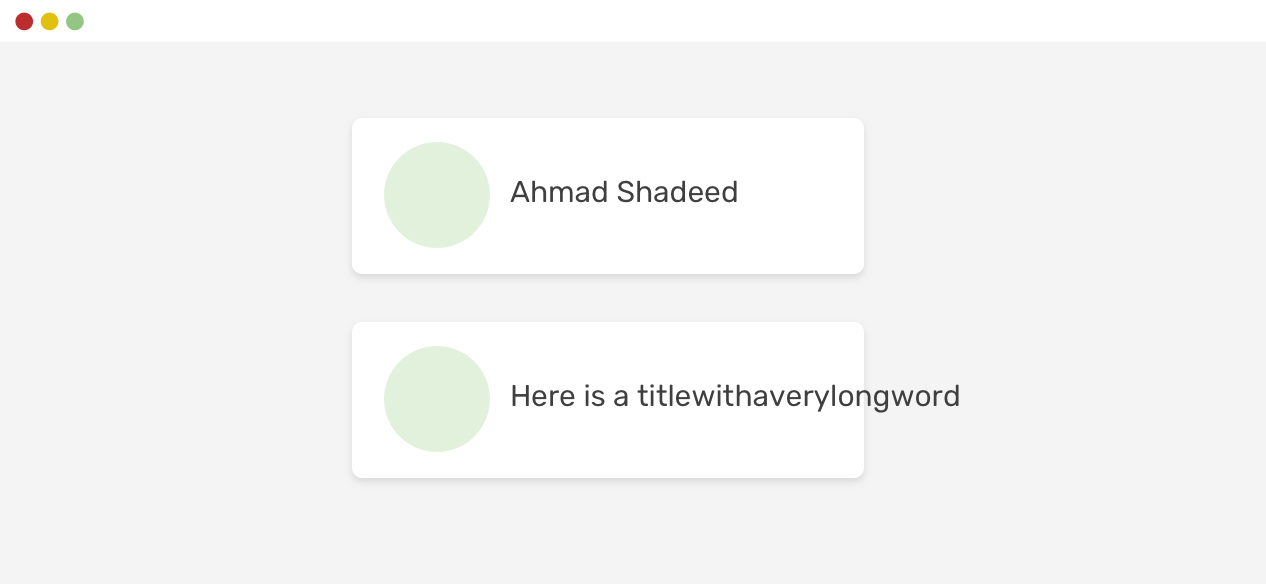
If a flex item has a text element or an image that is bigger than the item itself, the browser won’t shrink them. That is the default behavior for flexbox.

Consider the following example.

.card {
display: flex;
}

Even if we use overflow-wrap: break-word, it won’t work.

.card__title {
overflow-wrap: break-word;
}

To change that default behavior, we need to set the min-width of the flex item to 0. That’s because the min-width default value is auto, the overflow happens.

.card__title {
overflow-wrap: break-word;
min-width: 0;
}

The same thing applies to a column flex wrapper, but we will use min-height: 0 instead.

Examples and use cases

Long card title

In this example, the card title is too long. As a result, flexbox will apply the default behaviour which is to make the element size as equal to its content length.

That's because the default min-width value is auto.

This is a sampletitlethatisabiglong

To fix that, we need to apply min-width: 0 on the flex item. Try to check the "Toggle defensive" checkbox to see it yourself.

Fixed sizes

20 avril 2022 à 02:00

One of the common things that break a layout is using a fixed width or height with an element that has content in different lengths.

The fixed height

I often see a hero section with a fixed height and content that is larger than that height, which results in a broken layout. Not sure how that looks? Here it is.

.hero {
height: 350px;
}

To avoid the content leaking out of the hero, we need to use min-height instead of height.

That way, if the content gets larger, the layout won’t break.

The fixed width

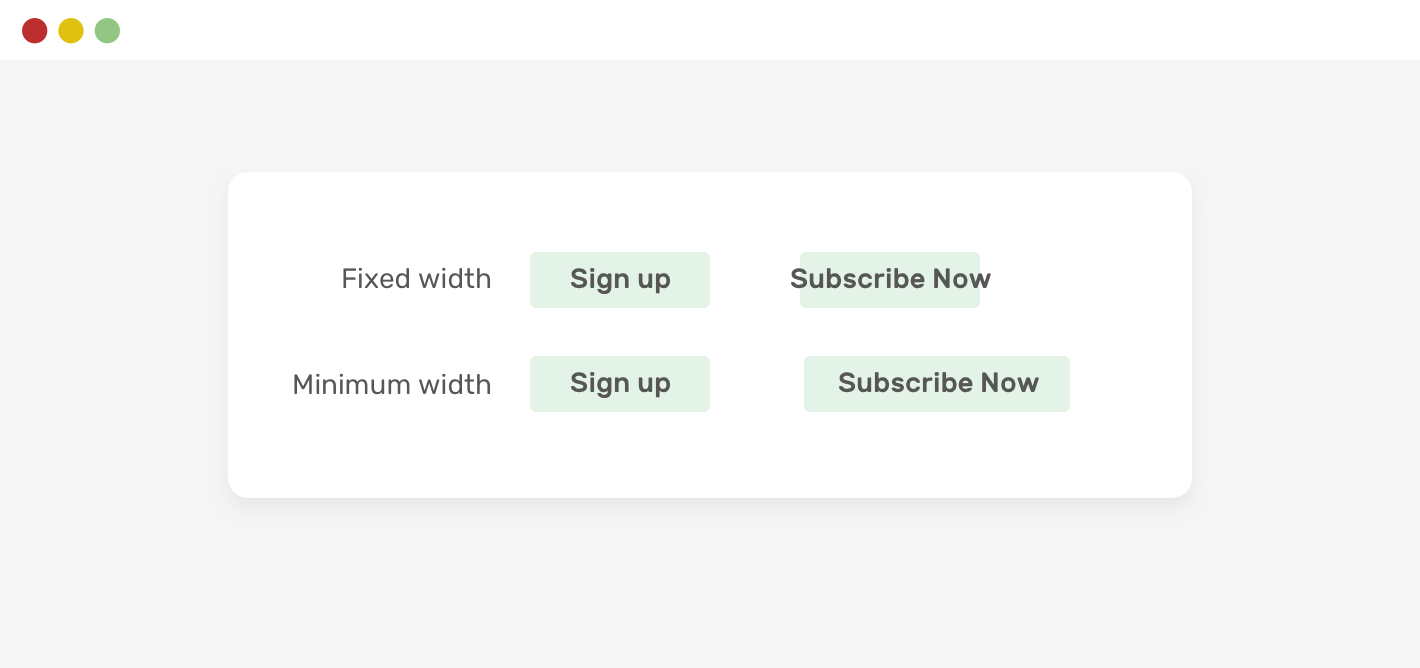
Have you ever seen a button that has its label too close to the left and right edges? This is due to using a fixed width.

.button {
width: 100px;
}

If the button’s label is longer than 100px, it will be close to the edges. If it’s too long, the text will leak out of it. This isn’t good!

To fix that, we can simply replace width with min-width.

Examples and use cases

A Fixed-height hero section

Lorem ipsum dolor sit amet consectetur adipisicing elit. Veritatis maxime aspernatur fugiat animi? Quae adipisci tenetur culpa quidem iste non quas, beatae, dolorem neque aut sunt magni minus, amet praesentium.

CSS Variable Fallback

20 avril 2022 à 02:00

CSS variables are gaining more and more usage in web design. There is a method that we can apply to use them in a way that doesn’t break the experience, in case the CSS variable value was empty for some reason.

This is particularly useful when feeding the value of a CSS variable via Javascript. Here is an example:

.message__bubble {
max-width: calc(100% - var(--actions-width));
}

The variable --actions-width is being used within the calc() function and its value is coming from Javascript. Let’s suppose that Javascript failed for some reason, what will happen? The max-width will compute to none.

We can avoid that ahead of time and add a fallback value to the var().

.message__bubble {
max-width: calc(100% - var(--actions-width, 70px));
}

That way, if the variable isn’t defined, the fallback 70px will be used. This approach can be used in case there is a possibility that the variable might fail (e.g: coming from Javascript).

Examples and use cases

An invalid CSS variable

.element {
background-color: var(--brand-color, lightblue);
}

CSS grid fixed values

20 avril 2022 à 02:00

Say we have a grid that contains an aside and main. The CSS looks like this:

.wrapper {
display: grid;
grid-template-columns: 250px 1fr;
gap: 1rem;
}

This will break on small viewport sizes due to the lack of space. To avoid such an issue, always use a media query when using CSS grid like the above.

@media (min-width: 600px) {
.wrapper {
display: grid;
grid-template-columns: 250px 1fr;
gap: 1rem;
}
}

Examples and use cases

Main and aside

In the following demo, try to resize the handler, you will notice that the grid will keep the two columns even though the space isn't enough. This will result in a horizontal scrolling.

When the "Toggle Defensive" is active, it will only add the grid if the viewport size is larger at a specific point.

Main section

Aside with fixed width

Background repeat

20 avril 2022 à 02:00

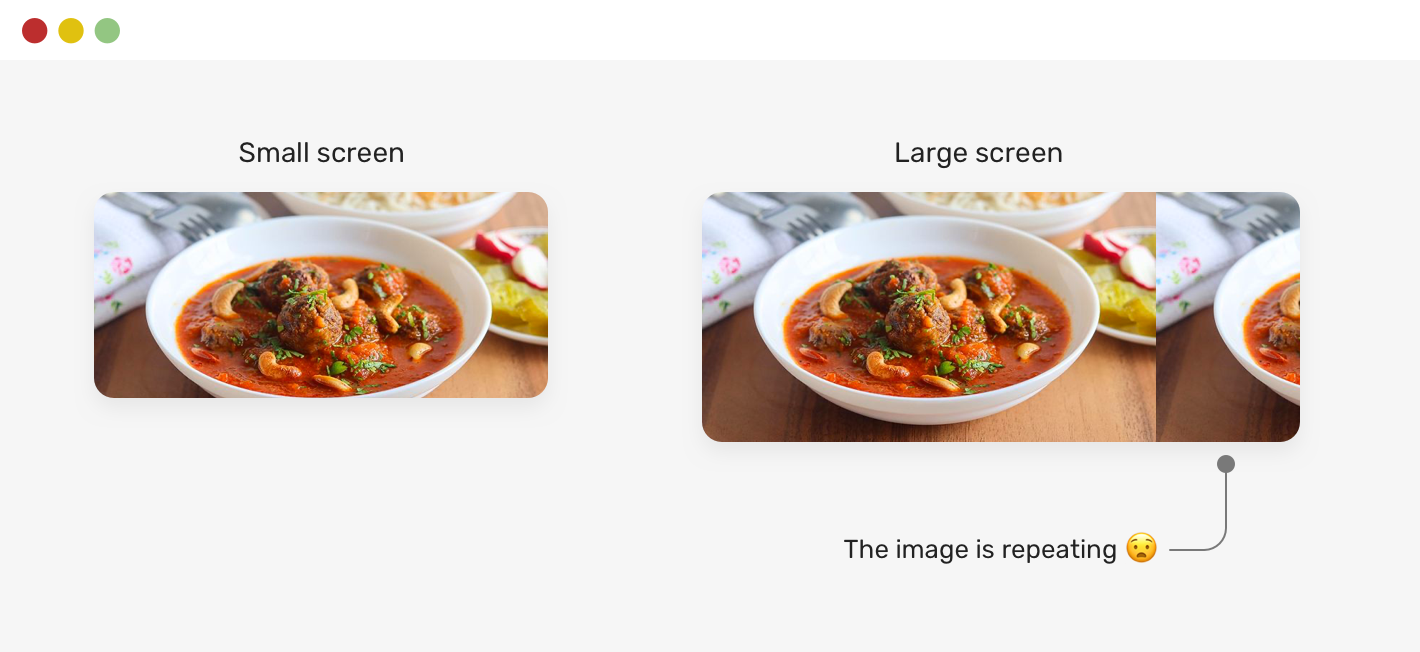
Oftentimes, when using a large image as a background, we tend to forget to account for the case when the design is viewed on a large screen. That background will repeat by default.

This mostly won’t be visible on a laptop screen, but it can be seen clearly on larger screens.

To avoid that behavior in advance, make sure to reset background-repeat.

.hero {
background-image: url('..');
background-repeat: no-repeat;
}

Examples and use cases

Section background

❌